


Melange - The Mission Interface:
2. Contents: The Mission Interface
- Introduction
- The Battlefield
- The Sidebar
- The Top Bar
- Multiplayer Panel
- Mission End Score Screen
- Backup Management Screen
![]()
1. Introduction
We feel that one of our greatest achievements in the design of Melange was the development of our flexible and detailed interface. We have taken considerable effort to study and compare the interfaces used in some of the more popular real-time strategy games on the market. We believe that this interface will allow the user to have optimum control over his forces and base management. We attempted to cling to two prime emphases:
- Completely mouse-driven, visual interface. The player should never have to memorise keyboard commands from the manual in order to control the game. Every command should be represented on-screen, and be available through use of the mouse (There is only one exception to this rule: team creation and selection from the keyboard is a common, almost standardised convention, so an on-screen teaming system was omitted). However, though this system makes the interface far more accessible to the novice, complete mouse control does not provide the speed and efficiency required by the advanced player in a real-time environment. Therefore, as the novice becomes familiar and comfortable with the interface, he will notice the keyboard command bindings displayed on-screen, and gradually pick up keyboard conventions at his own pace. Where possible, we have held to the established keyboard commands from earlier Westwood RTS products to aid familiarity for the experienced player. Adaptation to the new interface is also made easier by the fact that it has evolved directly from the current Command & Conquer interface.
- Satisfy the control freak. As mentioned earlier, every second counts in Real Time Strategy. The player can only ever concentrate on one thing at once, so we incorporated plenty of features that would allow him to easily monitor what's going on elsewhere, get to areas of conflict quickly, and command his forces clearly and easily. Often the player has already become accustomed to a feature found in another product, that makes his gaming life easier. He'll be expecting to find it here too, so we'd better give it to him. Automation is the second key. The player doesn't have time to babysit every Unit when his assistance is needed all over the map. So we wanted to create a "set-and-forget" atmosphere, where the player knows that he can leave his Units to their assigned tasks, confident that they are intelligent enough to take care of themselves until his return.
While we feel that the suggested interface does meet these requirements, the solution conjures up its own problems. One is that because of additional features and a visual emphasis, the interface appears more cluttered and complicated than the earlier incarnation. Also, some of the screen view has to be sacrificed so that more controls can be added to the sidebar. Most of the interface remains unchanged however, so any player who has experience with Command & Conquer, Red Alert, Tiberian Sun or Dune 2000 will already be in a comfortable environment. Detailed tutorial missions and in-game help further ease the user into the setting. Three levels of zoom magnification and the benefit of greater control largely outweigh the second problem.
One more word before we begin: we cannot take credit for all of the ideas found here: some have already been tried and tested in existing products, and several of them were gleaned from suggestions supplied by fans of the C&C series, most notably in Internet wishlists for Command & Conquer 2: Tiberian Sun, Dune 2000, and "Dune 3".
We apologise for areas of the design which are already familiar to you: to avoid ambiguity, we decided to describe the interface in its entirety. Some parts of the existing interface have only been slightly modified here; some have required no changes at all. Without further ado, the typical game interface is shown below:
2. The Battlefield
The Battlefield Window, or tactical map view, provides a detailed display of a region of your mission location, allowing you to control your Structures and Units, and plot cunning strategies against the enemy.
1. The Cursor
In previous Westwood real-time strategy games, the default cursor has been characterised by a plain white arrow cursor. As a cosmetic enhancement, each House could have its own unique default cursor. These cursors are as follows:
House Description Click point House Atreides A hawk's talon Claw of centre talon House Harkonnen A ram's head/hoof Tip of curved horn/cleft in hoof House Ordos A snake's head Fang in upper jaw of open mouth/forked tongue House Corrino A lion's paw Claw extended from index finger 2. Scrolling the Battlefield Window
The Battlefield Window only displays a small portion of the full map. To move to other areas of the map, move the cursor until it is touching any of the edges of the screen. Your cursor will become a thick white scroll arrow pointing in that direction, and your view will scroll until you pull back the mouse. If you have reached the edge of the mission map, then the cursor will become a scroll arrow with a red universal "no" slash over it (international symbol of prohibition). To move around the map more quickly, you can click and hold down the right mouse button anywhere on the map, then move your mouse in the direction you would like to scroll. The map will scroll at twice the regular rate.
Keyboard Command: The window can also be scrolled using the cursor keys.
3. Viewing Units
To check the condition of a Unit, hover the cursor over the Unit. You do not need to click the Unit. Its health bar will appear above the Unit, and its cargo level (if any) will appear below the Unit. The physical condition of each Unit is measured by its health status bar. The bar will display green as long as the Unit's health is good. As the Unit is damaged, its status bar decreases in size. The status bar also changes colour to indicate health level. Yellow represents marginal health, and red indicates critical.
When the cursor is placed over the Unit, the Unit Command Bar will also be updated, showing the Unit's experience level, behaviour settings, status, available commands, and so on. The same can be achieved (to a lesser degree) by holding the cursor over an enemy Unit. Only an enemy's House, health bar, Unit type (if known), experience, and status readout are shown on the Command Bar.
You will only know an enemy Unit's type if it exists in your Mentat Database. An entry for a Unit will be placed here if (a) you have discovered information about this new Unit through espionage, or (b) the Unit was encountered in the previous or an earlier mission. If you do not know a Unit type, it will appear as, for example, "Unknown Harkonnen Structure" or "Unknown Ordos Unit," with a question mark for a Unit portrait on the Command Bar. The Database itself will have a similar entry. This only really applies to unique Units. As all Houses use the same Refinery, for example, as long as you have a sufficient tech level to build a Refinery, you will be able to identify enemy Refineries. In this manner, the current status of your Structures and Units, as well as the enemy's, can be quickly and easily assessed.
Tool Tip: Placing the cursor over a Unit for a second will bring up a Tool Tip below the cursor. On the tag will be shown the name of the House that controls this Unit and the Unit type (if known). In Multiplayer games, the name of the player that owns this Unit will also be shown, as well as your relationship to this player (Ally, Neutral, Enemy).
4. Selecting Units
You will notice that when placing the cursor over a Unit, the cursor image changes to that of a thick white-bracketed box. This means that this Unit or Structure can be selected for your use. Left-click on a Unit to select it. Selecting an enemy Unit in this manner will not provide any further information than you were given when the cursor was over the enemy Unit. The only advantage will be that you will be able to track the Unit as it moves about the screen. If the non-player Unit moves into unknown territory, it will be deselected. A Unit that you cannot control will be indicated by a red selection box. With a player Unit selected, you can manipulate the Unit by issuing it commands with the mouse, or the Command Bar commands. To de-select a Unit or group of Units, right-click anywhere on the screen.
5. Grouping Units
It will often be useful to select more than one Unit at a time. To create a Group of Units rather than selecting and controlling each Unit individually, hold down the left mouse button in the Battlefield Window, and drag the cursor to include all of the Units you want selected. A white bandbox outline will encompass the Units you wish to select as a Group. Release the mouse button, and the Units are selected. If you reach the edge of the screen while drag-selecting, the Battlefield Window will scroll in that direction and all selected Units will be included in your bandbox Group.
All Units in the Group will then respond to any single command you give them. Your Command Bar will show the Group's leader, by default the most experienced Unit in the group, unless the Group contains a Hero. The leader of a Group can be changed from the Command Bar, but this will be explained later. You can now give the Group an order, just as you would an individual Unit. If a Unit in a Group cannot comply with the Group's overall command, for example, if a Medic is in an otherwise armed Group that is ordered to attack an enemy, the Medic will follow the rest of the Group, keeping the Group intact. During the skirmish, he will remain near the Group to provide medical assistance, but not venture so close that he is caught in the cross-fire.
When a Unit or Group is selected, a text overlay will appear in the top right corner of the Battlefield Window to indicate the selected components based on type. For example, an indicated group might be "1x Light Infantry; 3x Heavy Infantry; 1x Combat Tank" with each category on a separate line.
Double clicking a Unit will select all Units of the same type that are on-screen. For example, if you double-click an Atreides Sonic Tank, all Atreides Sonic Tanks that are in the current Battlefield Window will be selected.
6. Adding Units To a Group
To add a Unit to an existing Group, with the Group selected, hold down the Shift key, then bandbox the area that contains the additional Units. Once you let go of the Shift key, the Group will then include the selected Units. To add individual Units, click each Unit in turn rather than bandboxing.
You can also add a Group of Units to an existing Team (Teams are described in the next section) without selecting the Team itself first. To do this, bandbox the Group of Units that you want to add, then hold down Shift and press the Team's number key.
Keyboard Command: Add Units to a Team: Shift+1..0.
7. Creating Teams
Grouped Units can also be placed into Teams. A particular group can be saved and re-selected at a later stage.
To create a Team, you will first need to bandbox a group of Units (explained above).
While holding down either of the Ctrl keys, tap one of the numbers 1..0 on the keyboard to associate the Group to the appropriate Team number. To select the assigned Team, tap the number to which you bound the Team. Hitting the key again will centre the screen on this Team.
If a Team that is not on-screen is under attack, your Mentat will give you an audio warning such as "Team 2 under attack!" Note that in the Dune environment, Mentats serve the advisory function of a C&C EVA. Therefore they not only present missions during briefings, but the voice of your House's Mentat is also used to give verbal information on the field, such as "Construction Complete".
You can also "check up on" a Team by holding Shift+Alt+1..0. The screen will centre on this Team as long as these keys are held. Once you release the keys you will switch back to your previous location.
8. Targeting and Commanding Units
With a Unit selected, move the cursor around the battlefield area. Although each Unit is equipped with a number of special commands, a command will be intelligently selected for you based on the target. For example, you will see a Move cursor (a rotating white circle with opposing green arrows) over a terrain area that the Unit can move to. Left-click this area, and the Unit will move to that spot. If a group of Units is commanded to move to a location, they will remember the formation they were in when given this command, and re-assemble in this way (if space permits) once they reach their destination.
Some Units cannot move onto certain terrain types. For example, Vehicles cannot traverse rocky ground, but most Infantry can. In this case a Move cursor will not appear over this area. If you are commanding a group which consists of both Infantry and Vehicles, then a blue Move cursor will appear. Upon left-clicking, the Infantry will climb the rocky ground, while the Vehicles will not.
If any of your Units become hidden from view (if they are moved into a position where they are behind a cliff or Structure, for example), they are brightly outlined to show where they are. This does not work for enemy Units, however, so it is possible to conceal Units in the terrain for sneak attacks.
To attack an enemy Unit or Structure, select one or more of your Units with offensive capability, and move the cursor over the desired target. Left-click when you see the Attack cursor (a rotating white circle with extending red arrows). The target will flicker briefly, and your Unit(s) will attack the desired target. Most Units will continue attacking until they are redirected or until the target is destroyed. Commands can also be selected from the Command Bar (or using the appropriate keyboard command), and utilised in the same manner. This method will be explained later.
When Units are ordered to attack, they shouldn't try to approach their target and attack when it gets within range. Instead, when they're assigned a target, they should determine the location from which they can hit the target at minimum safe distance, and move there rather than to the target itself. They should take full advantage of the range of their weapons. Although in most cases the effect will be the same, there's a big difference when there's an extended obstacle (such as a mountain ridge) between the target and the attacker. The target is not within range, but he would be if the attacker moved closer to the ridge. In most RTS games, the attacker would start moving around the ridge to approach the target, rather than move to the position from where the target is within range.
When the attack is calculated, the Unit should also take into account whether the target is mobile or not. It is safe to attack a Structure from the maximum possible distance, as it is immobile and therefore not going to move outside of your firing range. For targets that are capable of movement, such as other Units, the attacker will first advance to a closer range before firing, such as half of his attack range.
Keyboard Command: Your Units can be commanded to attack all enemy Units in an area, rather than having to target each of them individually. With your Units selected, hold down the Ctrl key and drag the mouse to bandbox an area. Your Units will then systematically engage the selected enemies. Only non-allied Units in this bandbox will be targeted; player Units are not selected.
9. The Shroud
Initially most of the battlefield will be concealed in darkness. This Shroud represents areas of the map that have not yet been explored. Units have a limited and personal visual range, so their ability to penetrate the Shroud and reveal areas of the map differs between the Unit types. The Shroud operates in a particularly different manner during Night Missions.
The screen crackles with static and eventually turns black when the Battlefield Window is scrolled into shrouded areas. This visual effect makes the shrouded and revealed areas less distinct.
10. Cheat Codes
To cheat, or not to cheat, that is the question. Cheat codes are certainly a controversial issue. Reluctance to include them in a product is certainly justified: the temptation of cheating can often ruin the player's gaming experience. However, cheat codes can have their benefits: when the player has completed the game, and wishes to replay one of his favourite elements, show off features to a friend, or experiment with alternate methods. We would therefore like to make the following proposition concerning cheat codes in Melange: include them, but make them only operational after you have completed the game to its conclusion. The endgame sequence will queue an encrypted alteration of the configuration files that will permit the use of cheat codes after the initial completion, but only within the specific House and difficulty level chosen. So, if for example you have completed the game playing House Atreides on Easy difficulty, the cheat codes will work in that environment, but not if, for example, you tried to play House Atreides on Normal difficulty, or House Harkonnen on Easy level. In this manner, cheat codes can be legitimately used for extended play of your previous achievements, without harming further play of the remaining campaigns and challenge levels. Cheating is not available in multiplayer games.
Once the ability to use cheat codes has been granted, to activate the cheats, press the Enter key and a prompt will appear at the bottom of the screen. You will first need to enter the activation code for cheatmode: "Don't Mistake Lack Of Talent For Genius". Your Mentat will make a voiceover comment once the cheats are engaged, namely:
House Atreides: "Not the most admirable strategy, but effective!" House Harkonnen: "What took you so long?" House Ordos: "The pinnacle of efficiency!" House Corrino: "An excellent strategy!" You may then type in additional cheat codes. Some suggestions that we have are:
Invincibility: Nothing Can Stop Us Now Automatic Level Completion: The Sleeper Must Awaken Automatic Level Failure (all Units and Structures explode): Genocide/Stone Dead/ABBA Skip to Secret Level: Cunning Plan Skip to End Sequence: Not-So-Cunning Plan Unlimited Energy: I Am All Powerful See All Cloaked Units: The Spice Has Enhanced My Vision Empty Silos (keep credits): Come And Get It Fully experienced Units: Best of the Best of the Best Add 10, 000 solari to your counter: The Spice Must Flow/Money for Nothing Remove Hazards from Map: Wormicide/Non-hostile Environment Increase Missile Strength: Big Mac Instant Construction: Time is of the Essence Ability to build all buildings: We Have the Technology Reveal Entire Map: I See All
3. The Sidebar
1. The Construction Bar
1. Function of the Construction Bar
From this element of the Sidebar, you can construct a variety of Structures, train Infantry, and manufacture Vehicles and Aircraft. Initially (before you have placed a Construction Yard), this area will be completely blank. Once it is activated, four buttons become available, allowing you to build Structures (1) (produced by the Construction Yard), Infantry (2) (produced by the Barracks), Vehicles (3) (produced by the Vehicle Factory), and Aircraft (4) (produced by the Airbay and Missile Attack Centre).
Initially a portrait of the first Unit or Structure available in each specific category is shown, with a title at the bottom of the icon naming the Unit or Structure. If no Units are available in a particular category (for example, if a Vehicle Factory has not yet been constructed, and therefore there are no Vehicles available), then the Vehicle button is blank.
Structure icons have a symbol in the top left corner, indicating the number of terrain cells that the Structure will occupy when placed, and therefore how much Concrete it needs to be supported.
In previous games there has been no method of determining ahead of time whether placing a Structure will cause a blackout when placed other than guesswork, so such a measure will be implemented here. If a Structure in the list requires more power than you are currently producing, its icon will have a glowing lightning bolt (with the international symbol of prohibition over it) in its top right corner. You can also review its power requirement ahead of time via the Tool Tip. This should avoid unnecessary blackouts.
The up (5) and down (6) arrows are later used to scroll through the lists of Units, once a category has been selected. At the moment, they are unavailable.
Tool Tip: While the cursor is positioned over any of these four icons, the cost, and power requirement or output (if applicable) of the selected Unit or Structure will appear on a Tool Tip below the cursor.
2. Building, Queuing, and Cancelling
To begin construction of the currently selected object (the portrait icon already visible in any of the four boxes), click the left mouse button over the appropriate Portrait and the Portrait will become shaded. Your Mentat will say "Building" for Structures, Vehicles and Aircraft, and "Training" for Infantry. Fractions of the shading will be gradually removed, and your credit count will gradually go down. When the shading disappears, the full price of the Unit has been paid, and the building is ready. This process is referred to later as a timecycle. If there are any additional Structures capable of producing the current Unit, and they are idle and set to assist in construction, then the workload will be divided between the buildings, and therefore the time until completion will be decreased.
Further left clicking will queue additional build commands for the Unit. A number indicating the number of queued Units will appear in the top left corner of the icon. Players are not limited in the range of their queue. Due to the necessarily high build rate of this game mechanic, Units are generally built rapidly, especially cheap Units such as Infantry. This means that placing impractical caps on Unit queuing can create a huge annoyance for the player, for it does not provide the freedom of autonomy that he demands. The player should be able to queue up to nine Units for a category. Upon clicking the tenth time, the queue number will be replaced with an infinity icon, representing that the factory will continue to produce this Unit type until told otherwise. Right clicking over an active button will cancel current production. For example, if construction of a Vehicle was taking place, with a couple still in the queue, then the first right-click would put the current construction on hold (Your Mentat will say "On Hold" and the word HOLD will appear across the selected icon). The next right-click would remove a Vehicle from the queue. Once no more Units are queued, the next right-click would cancel production of the Unit completely, restoring the display to that shown above (Your Mentat will say "Cancelled").
To reduce the length of the building list and therefore additional scrolling by the player, some Structures have several types available from the same icon. For example, you can right-click the Concrete Slab icon in the Structure category to cycle through the Small (2x2), Large (3x3), and Huge (4x4) sizes in the same portrait icon. Left-clicking will start building this size of Concrete Slab.
An appropriate price is gradually extracted while constructing a Structure or Unit. Unlike in earlier C&C games, if you run out of credits (shown on the Credit Accumulator) during production, the construction will not automatically be put on hold. Once you have accumulated sufficient funds, construction will continue automatically. You can cancel production by right-clicking the icon while it is building. Cancelling will refund used cash, and restore the equivalent spice to your silos.
3. Selecting New Units
If you wish to select a different Unit or Structure from a category, an additional right-click on the portrait icon for the category will flood a list of the available Units for that category down the Construction Bar. Four are shown at a time. The up and down arrows (5 and 6) now become active, and can be clicked to scroll through the category's Units by left-clicking them. Right-clicking either of these buttons will scroll a page of Units in the appropriate direction.
Keyboard Command: You can also use the PgUp and PgDn keys to scroll a page of the currently open construction list.
When a new Unit becomes available, it is not appended to the end of the selection list, unlike in Command & Conquer, Red Alert and Tiberian Sun. Units in a category remain in a static order, as in Dune 2000, and thus can always be found where expected. This sequence is shown by the Structure and Unit indexes of the design portfolio.
Your Mentat will inform you with a category-specific audio queue when any of your selection lists are updated: "New Structures/Infantry/Vehicles/Aircraft available".
When in this selection list, left clicking on a button will place that Unit as the current active construction icon for the current category. If you want to change your mind and restore your original choice of Unit, just right-click and the selection list will be closed and you will be returned to the category menu. Upon selecting a Unit, you will be returned to the category list, and the timecycle for that Unit will begin.
4. Placing Built Structures
Once you have completed the production of a Structure, your Mentat will inform you of this by saying "Construction complete", and the word READY will appear and flash across the top of the Structure icon. At this point, it is still possible to refund the Structure using the right mouse button.
Left-click on the icon and the mouse cursor will become a placement grid on the battlefield. Right-click to remove the grid and return to the READY status. You can also left-click the icon again to rotate the grid for the Structure (assuming that it is not a square Structure). For example, a 2x3 Structure can also be placed in a 3x2 configuration, as if it had been rotated by 90 degrees. This makes it easier to position Structures within the limited space of your rock island. The icon will be updated to show which way the Structure will face. The placement grid will also change to the appropriate shape.
Keyboard Command: You can also use the Backspace key to rotate the building in the placement grid.
Move the grid to where you want to place it. If an area of the grid lights up red, then there is some form of obstruction in that area. Select a new location or move the obstruction if it is one of your own Units, and when you are satisfied and the grid is completely white, click the left mouse button to place the Structure. If placing this Structure will cause a blackout, then valid terrain is indicated by blue dithered cells instead of white. Once placed, a column of rock will erupt out of the ground, then the rock will peel off to reveal the placed Structure, which will then be operational (assuming you have enough power).
2. The Power Bar
The Power Bar is a visual indication of the total amount of energy your power producing Structures have generated (this includes Windtraps, Advanced Windtraps, Solar Batteries, and Geothermal Stations), shown by the vertical green bar. The horizontal indicator reflects your power threshold (the power level required in order to keep all your Structures at optimum power, or the relative amount of power that your Structures are drawing). The vertical bar will change colour to reflect your energy situation. If the bar is green, then you have surplus power. If it is yellow, then you are experiencing a brownout. Structure lights will dim and flicker. You are producing less power than your base requires. Some systems, such as your Mini Map, spotlights and power-dependent barriers and turrets, will shut down when you do not have sufficient power. Production will also drop to 50% during a brownout. If the Power Bar is red, then your power output is critically low, and you are experiencing a blackout. Structure lights will turn off completely. Production will drop to 10% of normal.
This functions in an identical manner to the Power Bar in Red Alert, except for a couple of differences. The indicator remains at the centre position on the Power Bar and the Power Bar is automatically scaled accordingly, allowing you to accurately determine your power level relative to your threshold level, even when producing large amounts of power. This is the power system used in Dune 2000, and effectively eliminates problems of power levels being unreadable when large amounts are being produced. This was previously problematic during the final stages of Red Alert, where vast power levels were required, and it was difficult to judge your power status once the threshold and power bars reached their peak.
When selecting a power-producing Structure, such as a Wind Trap, the percentage of your power output that this particular Structure is producing is outlined in green, starting at the bottom of the Power Bar. Equally when a Structure that drains power is selected, the Structure's power use is shown on the Power Bar, indicated by a red outline in a similar manner. This helps in judging the effect of individual Structures on your power supply.
Tool Tip: Placing the cursor over the Power Bar without a Structure selected will display the amount of power produced and needed in a numerical fashion and as a percentage on a Tool Tip. Eg: "Output = 250; Drain = 200; Power = 125%". Doing this with a Structure selected will show the power details for this particular Structure in the same format.
3. The Mini Map
The Radar Display (1) is initially blank (as shown above), overlaid with your House's Herald. If your base is equipped with a Command Outpost operating at full power (or, such as is the case for some earlier Ordos missions, you are provided with a surveillance satellite feed by the Spacing Guild), it will show you a fairly detailed account of your mission map's appearance, including explored terrain and enemy and friendly activity in areas that have been de-Shrouded.
The Mini Map allows you to simultaneously track the movements of your Units and those of your opponent in far-flung areas of the battlefield. With no Units selected, left-click on any spot on the Mini Map to shift the Battlefield view to the corresponding location. The white box on the Mini Map indicates the area of the battlefield currently in view on the Battlefield Window. The locations of your buildings and Units and your opponent's buildings and Units are displayed on the Mini Map as the appropriate colours for the Houses, with Structures indicated by a dark shade, and Units by a light shade. The currently selected Structure or Units appear white on the Mini Map. You can also move Units or groups of Units on the Mini Map by selecting them and then left-clicking on the desired destination on the Mini Map. Units under attack will flash on the Mini Map, releasing a "sonar ping", to aid in tracking them.
At short range (the default setting), only a portion of the map is displayed on the Mini Map; the Battlefield Window displays about a sixth of this area. This closer range makes it easier to distinguish between nearby Units, and detect enemy approaches. Left-clicking the right yellow button (6) in the Radar Display will toggle between short range radar, long range radar, and full-screen radar. When the button is illuminated, the long-range radar is activated. Here the map is scaled to a display that has minimal detail, but displays the entire map, allowing you to determine the extent of your environment at a glance. In full-screen mode, the Mini Map is displayed in the Battlefield Window. This allows considerably greater detail (for example, different icons can be used for ground and air Units) and more precise control of troop movements on the entire map.
To aid in distinguishing activity on the map, the yellow button on the right of the Mini Map (5) controls Mini Map terrain. Left-clicking this button cycles through regular terrain, monochrome terrain (as in Dune 2000), and no terrain (just show Mini Map objects and leave terrain area blank).
Right-clicking this yellow button will toggle player-specific colours on the Mini Map. So, with this feature active, hostile Units are shown as red dots on the Mini Map, allied Units as yellow dots, and your own Units as green dots. Currently selected objects continue to be shown as white dots. This means of showing Units and Structures based on their diplomatic status not only helps to differentiate between friend and foe, but also makes it easier to spot Units that would otherwise be easily camouflaged by their side's designated colour.
Keyboard Command: Shift+Tab will also toggle the uniform colour feature.
Sometimes a video sequence will appear on the Mini Map as a trigger to convey new information, update mission objectives, provide a message from your Commando in the field, and so on. These can be used as very effective devices for dramatisation and plot advancement, even as rendered scenes or stills to complement battle activity and character voiceovers. As they are superimposed on the Mini Map, they would take considerably less memory than full-screen cinematics while often achieving much the same effect, and integrating the two elements in a cohesive storyline.
1. The Maintenance Icons
Below the Radar Display are three icons: a silver Wrench (1), the Repair icon; a gold Dollar sign (2), the Sell icon; and a green globe half-obscured by a thick metal cloud (3), the Stormsheath icon.
1. Repairing Structures and Units
Left-clicking the Wrench icon will transform the cursor into an animated twirling Wrench icon. Left clicking on one of your Structures will repair it, for an appropriate amount of credits.
Using this icon on Units will order them to return to the base for healing or repair. In the case of Infantry, they will return to the Hospital for healing. If the Unit is a Vehicle, it will return to the Repair Pad. If the Unit is an Aircraft, and there is a Mobile Airbay available (a special Atreides Unit which has maintenance capability), then it will return there. Otherwise it will use the Repair Pad. Alternatively, if an appropriate mobile Unit that is capable of healing or repairing these Units (Field Medic or Salvager) is nearby, and his Behaviour settings permit sufficient Mobility, the healing Unit will approach the damaged Unit and effect repairs. When the Unit reaches full health, it and its healer will automatically return to their previous positions. If the selected Units are already at full health, or the appropriate Structure does not exist, they will ignore the command. If the required Structure or Unit is not available, your Mentat will tell you "Unable to repair Unit."
If a Carryall is available, then ordering a Vehicle to repair will page the Carryall to collect the Vehicle and drop him off at the Repair Depot. This will only occur if the time it would take to transport the Vehicle to the Repair Depot is shorter than the period it would take for the Vehicle to travel the journey on its own. If a Carryall is available once the Unit is repaired, it will be assigned to drop the Unit off at the original location. If the Vehicle remains untouched by the player up until the time that a Carryall does become available, then the idle Carryall will also return the Vehicle.
Keyboard Command: The T key will also select the Repair cursor.
2. Selling Structures and Units
Left-clicking the Sell icon will transform the cursor into an animated dollar sign, and clicking on Structures with this icon will sell them. You will be refunded half of the Structure's value, as well as its equivalent quantity of spice.
Vehicles and Aircraft can only be sold if your base is equipped with a Repair Pad. When placing the Sell cursor over a Unit, it turns green. A Vehicle or Aircraft that has been clicked with the Sell icon will enter the Repair Pad, where it will be scrapped, with the same refund as with buildings.
Infantry that are sold enter the Hospital, and their cash value is refunded in the usual method.
If you do not meet the requirement, such as an available Hospital or Repair Pad, then nothing happens to the Unit, and your Mentat says, "Unable to retire Unit" or "Unable to sell Unit".
Keyboard Command: The Y key will also select the Sell cursor.
3. Activating and Deactivating Stormsheaths
When the Stormsheath icon is left-clicked, the Stormsheath cursor will appear, and can be clicked on player Structures to sheath or unsheath them. The icon will become unavailable if an active Command Outpost does not exist.
An analysis of the surface of Arrakis confirmed that the establishment of base operations would be severely hampered by the desert and storm conditions. Many of our commanders (most notably those operating within the southern regions) would have you believe that our greatest adversary is not the rival Houses, but the planet itself. Sandworms continually endanger our harvesting operations. Constant maintenance of equipment is a necessity. Only the most heavily armoured Structures can hope to survive the passage of one of Arrakis' Coriolis Storms.
The Stormsheath was developed to assist in our battle against the elements. Most of our critical Structures are outfitted with heavy armour plating that can be invoked to envelop a Structure. This Stormsheath provides defence against storms, absorbing nine-tenths of their destructive power. In addition, a sheathed Structure is not affected by the gradual structural entropy usually inflicted by Dune's harsh environment.
Naturally, it was not long before the combat benefits of this weather shield were encountered. A Stormsheath is an excellent defensive measure against enemy assault, rendering most attacks negligible, absorbing three quarters of weapon damage. In essence, while its Stormsheath is active, a Structure is granted Very Heavy armour. We speculate that even atomics could be largely nullified.
However, the Stormsheaths are not without their disadvantages. The operation of Stormsheaths is only possible if a Command Outpost exists and is fully operational, as Stormsheaths rely on radar signals for the activation and deactivation transmissions. If your radar goes off-line, or your Outpost is destroyed or disabled, all sheathed Structures will become unsheathed, and you will not be able to activate any Stormsheaths until the Outpost is once again fully powered or sufficiently repaired.
When a Stormsheath is activated, the Structure is completely cut off from the outside world, including your power centres. A Sheathed Structure does not draw any energy (so Sheathing idle Structures is an effective way to conserve power), but cannot perform any function; all of its commands are unavailable, other than re-enabling the Structure. As a Sheathed Structure lacks an energy signature, it is not shown on the Mini Map, both your's and the enemy's. If the Structure has suffered critical damage while Sheathed (its health has been damaged down to the red), the option to remove the Sheath is unavailable until the Structure has been sufficiently repaired.
Certain Structures are not equipped with Stormsheaths, mostly barriers and defences. Most Structures that draw power but are not equipped with Stormsheaths can be shut down using the same Stormsheath cursor. When shut down, such a Structure will cease to draw power, but remain inoperative until it is re-activated by the player.
Although generally the Stormsheath icon has no effect on Units, there are a few exceptions. Used on shielded Units, it will switch the Unit's Shield to the opposite setting. If the Unit has Headlights during a Night Mission and no Shield, it will toggle the Headlights.
Keyboard Command: The U key will also select the Stormsheath cursor.
2. The Vertical Icons
To the left of the Radar Display is a vertical list of icons. The first (7) allows access to a system for selecting your Units based on specified categories. The remaining five icons control a combined bookmarking/camera system. The icons represent the following commands:
1. The Selector
The Selector system is designed to allow easy access to Units or kinds of Units, regardless of their location on the Battlefield. Want to select all of your Aircraft? Light Infantry, perhaps? Or perhaps there's a particular Unit that you've lost track of. This system will help you to track them down, without having to remember a host of keyboard shortcuts. However, shortcuts are available for each category once the User has become acquainted with the system.
When the Selector button is left-clicked, a column of six additional icons will appear, directly opposite the Selector button (indicated above as Column 1). The first icon can be toggled (using the right mouse button) between two options: a Window icon, and a Planet icon. The Window icon indicates that all the Units within the current Battlefield Window of the selected type will be selected. The Planet icon indicates that all the Units on the whole map of the selected type will be selected. Left clicking the Window icon will select all of your Units in the current Battlefield Window. Left clicking the Planet icon will select every Unit that you have in the mission.
Keyboard Command: E: Select all on-screen Units. Ctrl+E: Select all Units.
The remaining five icons indicate the broadest categories of Unit types, in order: Infantry, Combat Vehicles, Support Vehicles, Aircraft, and Other (Special Units such as Commandos or Crate Vehicles, and any other Units that do not fit into the other categories). Left clicking one of these will select all Units of this type, either onscreen or globally, depending respectively upon whether the Window or Planet is active. Right clicking one of the type icons will replace this column with a new column, showing a detailed list of all the Units in the selected category. For example, when right-clicking Infantry, a column of portraits representing each Infantry Unit (Light Infantry, Medium Infantry, etc) will be shown, in the usual building sequence (seen here as Column 2). The top icon (red looping arrow) can be clicked to return to the first list. The remaining icons are the same as the Portraits used on the Construction Bar. If there are more icons than can be fit on the screen (as in the current case), the last icon will become a pair of scroll arrows, which operate identically to the scroll arrows in the Construction Bar. Left-clicking on one of these Units will select all Infantry Units of this type, either onscreen or globally. Right-clicking will replace this column with the final level of the selection hierarchy, as shown by Column 3.
Keyboard Command: I: Select all on-screen ground combat Units. Ctrl+I: Select all ground combat Units.
Keyboard Command: O: Select all on-screen Aircraft. Ctrl+O: Select all Aircraft.
The Portraits shown here are the same as seen on the Command Bar. The picture is that of the Construction Bar Portrait for this Unit type, but with the title of the Unit's unique name. Again, the top arrow icon can be used to move one stage back up the hierarchy. Left clicking on one of these Units will select the individual Unit. As this is the extent of the Unit hierarchy, right-clicking on one of these third-column Units has a unique function. Holding down the right mouse button over a Unit icon will centre the screen on that Unit. Once you release the right mouse button, the screen returns to its original position. This ability can be used to quickly check up on particular Units without using Bookmarks and Teams, or leaving the current Battlefield Window.
Note that except in the final column, each Portrait icon has a number in the top right corner, much like the incrementor on the Portrait icon for training/building. This indicates the number of Units of this type that you own, onscreen or globally. In the above example, when Medium Infantry is expanded to show individual Units, four icons are displayed. Also, if the cursor is moved over any of the Unit icons, the associated Units will flash on the Mini Map, or the Battlefield Window if they are there, if you wish to know at a glance the layout of your Unit types without selecting them. To remove the Selector system, click the Selector button on the Sidebar again.
2. Bookmarks
A Bookmark is an area of the mission map that has been saved to one of four location addresses. You can save up to four Bookmark locations, represented by the four camera icons on the Sidebar. To save a position, move to the screen area you wish to save, then right click the camera icon of your choice (1..4) to assign this location to the Bookmark number. To recall the saved screen position, left click the camera. You can also "check up" on a Bookmarked location by holding down the left mouse button on the camera icon. The screen will then centre on this Bookmark location. Releasing the mouse button will snap back to the previous viewpoint.
If one of your Units or Structures is engaged in battle, and this is visible from one of the Bookmarks, the camera icon will flash red to warn you of this. It will also similarly flash white if a non-combat warning occurs at this location.
Keyboard Command: Hold Ctrl+F9-F12 to save a map position to any of these four function keys. Press the appropriate function key to recall that map position. To perform a "check up," hold down the Shift+Alt keys simultaneously when hitting one of the F9-F12 keys. The screen will then centre on the Bookmark location. Releasing the F9-F12 key will snap back to your previous viewpoint.
You can also broadcast Bookmark locations to the Mini Map, allowing the player to monitor distant locations of importance without having to move there via the Battlefield Window. Left click the green arrow to display the Bookmark location on the Radar Display. Left click it again to turn off the camera and restore the Mini Map display. When a Bookmark is shown on the Mini Map, its arrow will be light green, instead of the usual dark green. If none of the arrows are lit, then the Mini Map radar display itself is shown. The window isn't locked in place. If you desire, you can also scroll by moving to the edges of the Mini Map window. All main-screen commands also function on the window.
If a Unit is selected when a Bookmark is saved, then the camera will be 'attached' to this Unit (or the leader of a group), rather than a terrain location. It will follow the Unit as it proceeds about its tasks when it is viewed on the Mini Map. That way you can keep an eye on a Unit's progress while attending to other matters on the Battlefield Window.
Finally, you can set the cameras to intermittently cycle through in sequence on the Mini Map. Left click the Cycle icon (12), and the Bookmarks will be automatically broadcast in sequence to the Mini Map. Once it has moved through all four cameras, the Mini Map display itself will be shown (assuming that it is active), and then the cycle will be started again. You can control the delay between cameras switching using the two arrows directly to the right of the Cycle icon. Clicking the top arrow will decrease the delay (it will move through the cameras faster; the cycling triangle itself will also animate at a faster rate), and clicking the bottom arrow will increase the delay (keeping each Bookmark on the Mini Map for a longer period).
If you don't want to sacrifice the Mini Map view to review your Bookmarks, you can pull up an additional view window. To do this, right-click the green Bookmark's arrow instead of left-clicking. This viewer will then appear in the top left corner of the screen, just below the Top Bar. You can also shift it to the bottom left corner by right-clicking the arrow again. A final right-click will turn it off. This view displays the current Bookmark position, camera'd Unit, minimap messages, or whatever, keeping the true Mini Map available for showing the radar view.
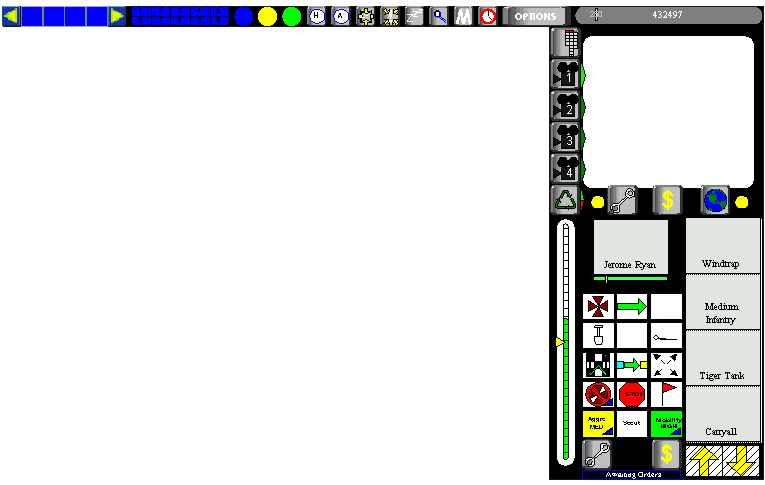
4. The Command Bar
The Command Bar functions in a similar manner to the Command Window in Dune II. When you left click on a Unit or Structure in the Battlefield Window to select it, a list of options similar to that shown above will appear for the given Unit or Structure. The Portrait icon (1) is identical to that shown for the Unit or Structure in the Construction Bar, except that it shows the unique name of the Unit itself (in this case, Jerome Ryan), rather than that of its Unit type. Left clicking on this icon will centre the screen on the Unit. Right clicking will keep the screen permanently centred on this Unit (Follow Mode; useful for tracking mobile reconnaissance Units, for example). This state is indicated by a red border that appears around the Portrait after right-clicking. Right-click again to turn off the auto-centreing.
Keyboard Command: The Home key will center on the selected Unit or Structure.
Tool Tip: Placing the cursor over a Unit's portrait will display its rank, number of enemy Units it has killed, and the number of experience points that it has earned since last being promoted. For example: Rank: Private; Kills: 4; XP: 55/100.
The Unit name mentioned above uniquely identifies the current Unit to aid in telling Units apart, particularly in large groups with differing assigned behaviours. It also helps to personalise Units, especially as they are now capable of gaining rank. This name is randomly selected from a database of suitable first and surnames (with a new name being selected if a Unit with the same name is already present). The name is assigned to a Unit once it is produced, and remains with it for the remainder of its existence.
The Unit's health bar is shown below the Portrait (2). On the left side of the health bar is a number indicating the amount of health the Unit has remaining. On the right side is the numerical value of the Unit's maximum hit points (These values are not shown on the diagram, as precise hit point values would have to be established through testing). Over the Unit's health bar is a vertical slider. This Repair slider controls the health level at which the Unit will automatically return to your base to be repaired or healed, or if it is a Structure, to begin repairing itself. If the Unit is a Vehicle and there is a Carryall available, the Carryall will collect it and take it to the Repair Pad (if the Unit will arrive there faster by air than by land). Setting the slider to the leftmost setting will make the Unit never return for repair automatically. Setting the slider to the rightmost setting will make the Unit return for repair as soon as it suffers any damage.
If the Unit has a cargo, it will be indicated by a series of pips in a horizontal row below the Health bar. There is sufficient space to accommodate two cargos, which some Units do have. These pips represent a predetermined quantity of the cargo, and the colour of a stored pip indicates the type of cargo. For example, an orange pip carried by a Harvester indicates a quantity of Melange Spice to the equivalent value of 100 credits.
The horizontal display at the bottom of the Command Bar is the Unit or Structure's Status Readout (3). This states its current action, such as Awaiting Orders, Attacking Target, Moving, Idle, Repairing, etc. This makes it very clear to the player what his Units are doing.
1. Commands
Each Unit or Structure type has a unique set of commands available to it. A Unit can have up to eighteen commands, displayed in six rows and three columns. Some commands only appear under certain circumstances. For example, the March command appears only when you have a group of Units selected, while an MCV's Deploy command will only appear if it is positioned at a loction where deployment is not obstructed. The first six icons differ from Unit to Unit, and are described in detail for each Unit in the Units section of the portfolio. The next six are standard advanced commands that almost all Units can use, such as setting waypoints, scattering, escorting and retreating. The row following these (4) controls the Unit's Behaviour settings and automated scouting. The final row controls maintenance for the specific Unit, with options to Repair, Stormsheath (if applicable) and Sell. To select a new command for the Unit, left click on the desired button. Its effect may only last until the next click on an object on the battlefield, or may be a toggle effect, depending on the command.
Structures, except for a couple of rare exceptions, have at most nine command icons, including the standard maintenance icons. Their precise configuration is shown later in the Structure Commands section. First we will detail the layout of Unit Commands.
2. Unit Commands
Some Unit Commands may seem familiar, as they were originally used as advanced keyboard commands in Red Alert. The command shaded cyan is the currently selected command. With the Unit selected, left clicking on an area of the Battlefield will order the Unit to perform that action on that target. By default, the interface will automatically endeavour to select the appropriate command for the given target. For example, if the target is an enemy Unit or Structure, and the Unit is capable of combat, the Attack icon will illuminate and the Attack cursor will appear. Left clicking on the enemy will cause the player Unit to approach the target, and once in range, attack it. If the target is an area of terrain, the Move icon will be selected along with the appropriate cursor, and the Unit will attempt to plot a path towards that terrain cell. However, if you want to force a particular action over the default intelligent cursor selection, or perform some advanced action, you will need to use the option on the Command Bar, or its keyboard equivalent.
The eighteen icons are split into two categories. The lower twelve are useful commands that are utilised by almost every Unit, and the upper six differ from one Unit to the next. The unique commands are also categorised. As an example of command options, below is a detailed description of the operation of an Atreides Light Infantry's commands (in descending rows from left to right):
1. Attack (Fire Assault Rifle): The first icon controls this Unit's primary ability that makes use of an object targetting process. Typically a command to Attack is found here. Manually selecting this command forces the Light Infantryman to use its rifle to attack the target, regardless of its nature.
Keyboard Command: Ctrl+Left Click: Force Attack / Primary Target ability.
2. Move: This command orders a Unit to occupy the targeted location, plotting the most effective course to this position. Targets in motion are more difficult to damage. Manually selecting this icon will force the Unit to move irrespective of the nature of the target, even moving onto an object it would normally attack. If used on a Structure, this will command an Infantry Unit to capture the Structure. This procedure is explained later in the Units section. Unless a Unit is for some reason immobile, it always has the Move command. Commanding a tracked Vehicle to Force Move onto an enemy Infantryman will command the Vehicle squish him. It will pursue him until it runs him down.
Keyboard Command: Alt+Left Click: Force Move.
3. Throw Grenade: This icon controls any additional ability that the Unit has that would be used on another target. Ordinarily, this button would be blank for a Light Infantryman, but lucky Jerome has managed to survive long enough to reach Sergeant veterancy, so he is now equipped with a grenade launcher attachment to his rifle. In this case, this command forces the Light Infantryman to throw a Grenade at the target, its secondary armament normally reserved for Vehicles and Structures.
Keyboard Command: Q+Left Click: Secondary Target Ability.
4. Fortify/Exit: The fifth command icon achieves the same purpose as clicking a selected Unit with the Deploy Cursor. In this case, deploying creates a fortification around the Light Infantryman. All Light Infantry are outfitted with a field shovel and a couple of empty sandbags in their backpacks. When commanded to fortify, he will dig a foxhole, and protect it with a small barrier of sandbags (created from the plentiful supply of sand nearby). The Fortify command is only available when the Unit is on sand or dune, and is further detailed in the Light Infantry section of the Units Portfolio. Once a fortification has been created, an Exit command replaces the Fortify command. As the Unit is now immobile, the Move command also becomes unavailable. Left clicking the new Exit command, clicking the Deploy cursor on the Unit, or attempting to move again will dismantle the fortification and return the Light Infantryman to regular use.
Keyboard Command: D: Deploy/Undeploy.
5. : For this particular Unit, this icon is not used, and thus is blank. Generally, however, cyclic commands are placed here. Any button that can cycle will have an arrow in the bottom right corner of the icon to indicate this.
Keyboard Command: W: Cycle through a set of Unit options.
6. Lie Prone/Stand: As in Red Alert, to increase the chances of an Infantryman's survival, he can lie prone to avoid fifty percent of an enemy's attack. This command orders him to switch between the two modes, particularly useful if, for example, the Unit is being pounded by enemy fire, and you would prefer him to run from the enemy rather than crawl. Typically toggle options such as this, that are particularly common over a broad variety of Units, are found here.
Keyboard Command: A: Toggle Unit State.
7. Waypoint: We have now reached the second half of the commands; the standard set. Clicking on the Waypoint button will toggle the ability to queue intuitive non-persistent Unit waypoints, and therefore chain together multiple commands. This will allow you to plot a series of paths or commands for the Unit to follow. Handy if, for example, you want to take a Unit on a semi-circular path around an enemy turret, without having to lead him around order by order. Select targets and perform actions as usual. Target locations on the battlefield will be linked by green lines, with the relevant cursors remaining on the screen. An incrementing green number will appear beside each cursor on the map. To start the Unit or group of Units along the set of Waypoints, left click the Waypoint button to turn off the Waypoint system. If there are any Waypoints queued, the Unit will follow them, finishing each task before proceeding to the next. Once a task is completed, it will be removed from the waypoint queue. Otherwise, commands will be followed as always. The Unit(s) will follow these orders until they are completed, or they are overriden by a new command. Sometimes you may need to give a command to a Unit to perform immediately, while he still has a series of waypoints to complete, for example, if he suddenly encounters an enemy Unit in his way. You can press Ctrl+Shift+click to insert a command at the first position in the queue. Once it is completed, the Unit will continue with his remaining tasks. When the Waypoint command is activated, all waypoints that you have currently laid down are shown.
Keyboard Command: Shift+Left-Click: Add a Waypoint.
8. Escort: With the Escort command, you can assign a Unit or group of Units to defend another Unit as it moves around the battlefield. To do so, select the Escort command, and an orange selection cursor will appear. Left click on the Unit you wish to escort, and the selected Unit or Units will begin to escort the target. The escort will continue to attack anybody he sees (Behaviour settings permitting), but will never leave sight range of the guardee, pursuing it as it moves, and it will return closely to it when not engaging the enemy. If the guarded Units becomes airborne, for example, if a Harvester is picked up by a Carryall, the guarding Units will follow the Carryall to the spot where the Carryall will take the Harvester. If the selected target is a terrain cell instead of a Unit, then a Patrol route is established between the target destination and the Unit's current location. The Unit(s) will continue to follow this path until given new commands. You can set a series of Patrol points using waypoints. Once reached, the Patrol points will remain, and the Unit will move back and forth along the waypoints. If the current and first waypoints come within a few pixels of each other, they will automatically link, and a circular path will be created. Maintenance Units on a Patrol path will heal or repair nearby Units as they move if they are set to high Mobility.
Keyboard Command: Holding Ctrl+Alt creates an orange select cursor. Left click the target while holding these keys to Escort or Patrol.
9. Scatter: A Unit or group of Units commanded to Scatter will move in a random direction for a short distance, allowing them to dodge out of harm's way of incoming shrapnel, for example. Right-clicking the Scatter button will toggle the Scatter state. The Unit or group of Units will continue to Scatter until the button is clicked again, or a new command is given. For Aircraft, the Scatter command will allow them to dodge enemy fire. Once they have finished Scattering, they will return to their original orders (such as engaging the target).
Keyboard Command: X: Scatter. Alt+X: Toggle Scatter.
10. Preset Behaviour: This option can be used to set a Unit or group of Units to a particular configuration of Aggression and Mobility Behaviours (Behaviour is explained below). Right clicking will cycle through the Behaviour Presets. Left clicking will toggle the Preset. The Unit or group will regain its/their original Behaviour settings once given a new command.
Catatonic: This command orders a Unit to make absolutely no automatic action until told otherwise. It will abandon any order it was previously given, stop, and ignore anything nearby until it is given a new command. That is, it will temporarily be given Behaviour orders of Aggression Red, Mobility Red until the Unit is given a new command.
Cease Fire: This command orders a Unit to not open fire on any enemy Units until ordered to. It's Aggression level becomes Red, but the Mobility option will not be modified.
Keyboard Command: C: Enter Cease Fire mode.
Flee in Terror: The Unit will not attack the enemy, as above, but will automatically flee from the enemy if he is attacked. This is a special version of Aggression Red, Mobility Green.
Hold Position: The Unit maintains a default level of Aggression (Yellow), but becomes rooted to the spot (Mobility Red).
Default: One-click restoration of default Behaviour settings: Aggression Yellow, Mobility Yellow.
Turret: The Unit will hold its current position and open fire on enemy targets that come in range with extreme prejudice. Aggression Green, Mobility Red (although they are not actually updated, as the original settings will be restored once the Unit is given a new command).
Guard: The Unit is given free reign in his interaction with the enemy, acting as an autonomous individual. He will automatically use his special abilities to his discretion. For example, Fremen Hookmen will automatically capture nearby Sandworms, Medics not only heal but also inject nearby Units with Elacca drug, Infantry will capture adjacent enemy Structures that have been critically damaged, and so on. The player will not have to micromanage the traits of individual Units when they are in this mode. When given a new command, the Unit will cancel out of Guard Mode and return to his previous Behaviour settings. Aggression Green, Mobility Green.
Keyboard Command: G: Enter Guard mode.
11. Stop: This will command a Unit to abandon any action it is currently performing (moving, attacking, etc) and become idle. Aircraft will return to the Airbay. If the Unit does not have an order to cancel, then when commanded to Stop, the Unit will freeze. He will not move from this spot, nor react to enemies, until given another command.
Keyboard Command: S: Stop.
12. Retreat: A Unit commanded to Retreat will automatically return to your base. If a Carryall is available and the Unit is a Vehicle, the Carryall will pick up the Vehicle and drop it off at the base, if it will be faster than the Vehicle making the journey on its own.
Keyboard Command: R: Retreat/Return.
1. Unit Behaviour
The three Behaviour commands along the next row (4) control how severely the Unit reacts to the enemy without your supervision.
The two square icons on the left and right can each be cycled through three states, indicated by turning red (low), yellow (medium) or green (high), in that order. Left click to cycle through the states. Right clicking either of the icons will cycle in the opposite direction. The first box controls the level of Aggression that the Unit uses when encountering an enemy. The second box controls the Unit's Mobility; the degree of automatic freedom of movement it has when encountering an enemy.
By default, Units are set to the medium Aggression and Mobility settings when produced (though this default can be modified from the factory itself). Typically, the Units will act with a degree of intelligent autonomy, regardless of their veterancy, without the intervention of the player. He has enough to worry about without having to babysit individual Units. He should be able to "set and forget" Units, confident that they will perform their assigned tasks well enough on their own. Infantry will independently scatter, while tracked Vehicles will automatically try to crush them if their weapons are not effective enough. Units will flee when they have suffered a predefined level of damage (making the preservation of veteran Units that much more convenient), return for repair, and report back to their previous locations, all with the aid of available support Units such as Carryalls and Medics where necessary. Maintenance Units will automatically perform their tasks unless told otherwise: not the other way around. Units will automatically move to engage attacking Units, especially when adjacent Units are being pummelled by enemy fire. If a large group is commanded to attack an enemy, and those at the rear cannot reach the target, they will not scurry about ineffectively, they will engage other nearby enemies.
The settings for the commands are as follows:
Aggression:
Red: Hold Fire. The Unit will not attack an enemy until ordered to do so. The Unit will ignore an enemy in range when moving towards a destination. Yellow: Fire at Will. The Unit will give highest priority to its current orders, but will take advantage of convenient targets. For example, when moving, the Unit will open fire on the enemy as it moves past, but will not stop to engage the enemy. If the Unit is unable to fire while moving, then it will ignore the Unit if it is able to outrun it, but stop and engage the enemy if the opposition is capable of outrunning it. Once the threat has been dealt with, it will continue on its earlier route. The Unit will return fire without confirmation. This is the default setting. Green: Free Fire. The Unit will attack any other enemy Unit in range. The Unit will also abandon any orders it is currently carrying out to engage an enemy in range. Mobility:
Red: Hold. The Unit will hold its position, firing but not following. It will not move from its assigned position. Yellow: Follow. The Unit will pursue the enemy for a short distance, and then return to its previous position. The Unit can move within a short range of its starting position to carry out its starting orders. If the Unit is close enough to see another player Unit that is under attack (it is in its sight range), even if it cannot see the enemy itself, it will approach the Unit to provide assistance, tracking the enemy by following the course of its projectiles. Once the threat is dealt with, it will return to its original location. If the enemy is beyond its pursuit distance, it will not move to engage. This is the default setting. Green: Hunt. The Unit will continue to pursue its target until it is destroyed. The Unit is permitted a free range of movement when interacting with enemy Units. It will assist nearby player Units in a similar manner to the above behaviour, but will not remain within a minimum distance. The differing levels of Aggression and Mobility can be combined to produce simultaneous behaviour. For example, the Turret Mode is a combination of high Aggression and low Mobility. Thus the Unit will not move from its current position, but will destroy any Unit in range.
Between the two Behaviour settings is the Scout command. Left clicking this button will cause the Unit or group of Units to randomly move about the map's uncharted territory, uncovering the Shroud until you give it another order. This is useful early in a mission to uncover the map, or "mop up" survivors of your conquest at the end of the mission, without taking time to guide your Units around manually. When encountering an enemy, a Scouting Unit will use its Aggression settings to decide how it will deal with the situation. Low scouting aggression is entirely non-hostile. The Unit will ignore enemy Units that attack it, and continue to scout. Medium scouting aggression will cause the Unit to fire on enemies as it passes them with hit and run tactics, but not will directly engage the enemy. Encountered enemies will suffer a brief attack, and then the scouting Unit will fall back, or flee if necessary. High scouting aggression will command the Unit to attack any Unit it encounters, and keep attacking until the Unit is destroyed. If the enemy attempts to evade the Unit, it will be hunted down. When commanding Harvesters to scout, they will specifically search for spice. If they encounter any, they will automatically start harvesting. Giving the Unit another command, or de-selecting the Scout button will cancel the automated scouting.
The last three icons below the Behaviour settings are Repair, March (for a group of Units) or Stormsheath (for a Structure), and Sell. While Repair, Stormsheath and Sell perform the same function as the Maintenance Icons below the Mini Map, they are particularly useful when giving a mass command to a group. For example, instead of having to click each Unit manually with the Repair icon, simply click the Repair icon visible on the Command Bar, and the group will go for repair automatically.
2. Unit Experience
Players will be encouraged to carefully preserve their Units, due to the fact that they will become more valuable and powerful the more they achieve. With each kill that a military Unit makes, for example, it will gain experience points from the kill. Each Unit type is assigned a particular experience point value. Most Infantry are worth 5 XP, and most vehicles are worth 25 XP. Heavily armoured, valuable Units such as Harvesters and MCVs are worth up to 60 XP. Structures are considerably more valuable, so they are worth far more. While basic Structures such as Walls are about the same price as Infantry, more vital Structures can be worth up to 80 XP. Naturally, Turrets do not gain experience for kills. Every kill adds the value of the killed Unit to the victor Unit's personal experience tally. Once the Unit has achieved ten times the point value of his own experience, he will gain a rank, and his XP total will be reset to zero. For example, a Light Infantryman worth 5 points will need to earn 50 experience points to gain a level, and a tank worth 25 points will require 250 experience points to gain a level.
The player will be rewarded for successfully tackling stronger Units with weaker ones. Therefore a Unit will only receive experience for the kill if the Unit killed has the same or greater XP value as itself. Slaughtering scores of Light Infantry with, for example, a Siege Tank, will give no experience benefit to the player's Siege Tank. A Siege Tank will have to tackle an opponent of equal or higher worth to gain experience. In addition, Vehicles which are destroyed by Units with rather weak weapons will have a far higher scrap value. For example, if a Missile Tank destroys a tank, the tank would be blown to smithereens, leaving behind little more than smouldering debris. If a tank is destroyed by a Light Infantryman, almost the whole Tank would be left behind as a piece of wreckage. Thus killing a Unit with weaker Units would have a greater benefit when selling the scrap. These two factors will encourage the player to take risks and utilise his weaker Units.
Each Unit begins at the rank of Private, that of a lowly "grunt" soldier, when first produced. When a Unit has earned ten times its own experience point value, it will be promoted to the next rank. For example, a Private will be promoted to Corporal. As well as being shown on the Unit's Portrait Tool Tip, the rank of a Unit is indicated by a symbol in the bottom right corner of its selection box in the Battlefield Window. A Private begins with no icon. When he becomes a Corporal (the first level of Veterancy), a roman numeral II reflects this. The third rank is Sergeant (indicated by a triangle), fourth is Captain (a square), and the fifth and final rank, automatically granted to all Commando Units, is Colonel (a pentagon). The symbol has the player's House colour. Rank icons are always shown (not just when the Unit is selected), even on enemy Units.
Upon being promoted, a Unit will gain enhancements to its statistics; Health, Armour, Firepower, Rate of Fire, Movement Speed, and Range are upgraded on gaining a rank, much like the effects of bonus crates, though with a lesser degree of enhancement. Some Units will gain new skills and abilities as they progress through the ranks. For example, a Light Infantryman will gain a Grenade Launcher attachment to his Assault Rifle upon being promoted to Sergeant, giving him a new edge against armoured targets.
Upon reaching Corporal rank, Units gains the Self-Heal ability. Additional rank increases will increase the rate of healing. This will considerably increase the life expectancy of valued veteran Units, especially in non-base missions, where resources are limited.
3. Multiple Unit Commands
The above image shows an example of the Command Bar for a group of twelve Units, consisting of a mixture of Light and Medium Infantry, and Light Tanks. Your Command Bar Portrait will show the group's leader (in this case, the Light Tank driver Anton Mohia). By default, the most experienced Unit in the group is designated the group leader, unless the group contains a Commando, in which case he will have immediate preference. Only commands that are shared by all Units in the group appear on the Command Bar. Changing the Health Repair Bar or Behaviour settings will change these settings for the whole group. The name, health bar, experience display and Status Readout for the group's leader are shown (Recall that the individual health bar of each Unit is shown above the Unit on the Battlefield Window). The leader is indicated by a selection box of the House's colour on the Battlefield Window. However, the leader can be changed by cycling through the Units in the group using the blue arrows on either side of the Portrait.
The final new addition is the March button, which appears between the Repair and Sell icons. Toggling this command (it illuminates when activated) will set all Units in the group into March Mode (indicated by a small M in the corner of each Unit's selection box). Units in March Mode will move neatly at the same speed as the slowest Unit in the group, therefore faster Units will not rush ahead of the rest of the team and get slaughtered by the enemy as they wait for backup from the heavy Units. Groups move naturally in formation, with the weakest Units protected at the back, and the strongest absorbing enemy fire at the front. Units of the same type cluster together. Units with a short range will move to the front, and long-ranged Units will take up position at the rear, moving as far back as their firing distance allows, while remaining in close proximity to other Units in the group. If combat is engaged, the formations will hold, but they'll change to allow groups to pass smoothly through relatively narrow passages.
You can also specify a formation for your Marching group from a number of options. Right-click the March button to cycle through the formation types. A stylistic representation of the selected formation will appear over the March button. The formation types available are as follows:
- Custom: The default setting. Units do not take on any precise formation, but will endeavour to retain whatever positions they were in upon entering March mode. Therefore the player can set up a formation however he sees fit.
- Column: The Units will line up in rows of similarity.
- Arrow: A V-shaped formation, with the strongest Units at the apex, and increasingly less armoured Units taking position up the arms.
- X: An X-shaped formation, with the weakest Units at the centre, and strongest at the corners.
- Protect: A circular formation, with the most heavily-armoured Units on the outside, and the weakest protected on the inside. If there is a Commando in the party, he will remain in the centre of the formation. The Units are pointed outwards, so this formation is particularly effective against attacks from all sides.
- Checkerboard: Units spread out over as wide a distance as space allows, but with a uniform number of vacant cells between them. This formation is especially effective at avoiding projectiles that cover a wide area with considerable splash damage, such as artillery.
Keyboard Command: March mode for a group can also be toggled with the M key. Press Alt+M to cycle through formation types.
4. Structure Commands
The Structure Command Bar has a similar configuration to that of the Unit Command Bar. You can centre on the Structure by left clicking its Portrait, and its damage level is shown below, along with the vertical Auto-Repair slider. The Repair slider states the minimum health level the Structure is permitted to reach before automatic repair begins. Setting the slider to zero will turn off automatic repair for the Structure. The same layout for cargo storage also applies. In the given example of a Refinery, the horizontal row of orange pips below the Health Bar shows the Refinery's spice storage.
Tool Tip: Placing the cursor over the Portrait will display a Tool Tip showing its power levels. This consists of two components: the amount of power the Structure generates versus the total amount generated, and the amount of power drained by this Structure versus the total amount drained. For example, for a Wind Trap the Tool Tip might display "Output: 100/400; Drain: 0/150". For a Vehicle Factory, "Output: 0/400; Drain: 30/150".
Below the cargo bar are the nine commands available to this Structure. The bottom row are the Structure's maintenance icons: Repair, Stormsheath and Sell (if available for this Structure). If the Structure is equipped with a Stormsheath, the button becomes illuminated when the Stormsheath is activated. The green tab in the top left corner of the Stormsheath icon controls whether or not this Structure will respond to the Global Sheath command (activated by right-clicking the blue Storm Alert button on the Top Bar). Left-clicking the tab will switch between the two states. If the tab is light green, it will respond to the Global Sheath. If it is dark green, it will ignore this command.
Keyboard Command: Ctrl+T will sell the selected Structure. Ctrl+Y will repair the selected Structure. Ctrl+U will toggle the Stormsheath of the selected Structure.
The first command icon on the Refinery Factory Command Bar controls Rally Points. Clicking on this button, then an area in the Battlefield Window, will cause all Units produced from this Structure to congregate at this position, instead of clogging the exit from the Structure. A dotted-green line will indicate the path from the Factory to the Rally Point when the Factory is selected.
Keyboard Command: With the Factory selected, Ctrl+Alt+Left-Click will set the Rally Point for this Structure at the selected location.
In addition to the Rally Point icon, Factory Structures (those that can build or train mobile Units) also have the second icon, the Team icon. This is used to automatically assign produced Units to a specified team as soon as they are produced. Right-click on the icon to cycle through the Team numbers 1 to 0. Left click to toggle the Add To Team state on and off. When it is active, the border of the icon will glow (as shown above), and this Team number will be shown over the Structure.
Keyboard Command: With the Factory selected, Ctrl+1-0 will set an Add To Team state for this Structure to the particular Team.
If the Structure has an upgrade option (such as this Refinery's ability to be upgraded to an Advanced Refinery; its third icon) the upgrade will take place when this button is left clicked.
Tool Tip: Placing the cursor over the upgrade button will give a description of the upgrade, such as "Upgrade to Advanced Refinery", and the cost of this upgrade on a Tool Tip.
The second row of command icons for the Factory Structures are Mobility, Preset Behaviour, and Aggression icons, as seen earlier in the Unit Command Bar. These control the default Behaviour settings that Units have when they first emerge from the Factory.
If the Structure is capable of producing Units, the selected Unit type's icon is shown below the six commands, and above the Status Readout. For example, the Refinery is able to manufacture replacement Harvesters (handy if you don't have a Vehicle Factory available), hence the Harvester icon below the command buttons. Detailed use of this facility is shown in the next section. The tab in the top left corner of the Harvester Portrait will toggle whether or not this Refinery will automatically assist in the construction of a Structure or Unit it is capable of producing if it is idle (not already engaged in another task). In other words, if another Refinery begins building a Harvester, this tab identifies whether the current Refinery will use its facilities to increase the rate of production, or keep out of the Harvester manufacturing process. If the tab is dark green, the Structure will not Assist in Construction If Idle. If the tab is light green, it will assist. For example, if a Medium Tank is built from the Sidebar, all Vehicle Factories that are not busy with another task, and have this option checked, will divide the construction task between themselves. The completed Unit will appear from the selected primary building. A Building can be made primary by double-clicking on it.
1. Building from the Structure Command Bar
If the Structure is capable of building any Units, a button for the currently selected Unit available for construction is shown below the six command icons. This system works in a similar manner to construction on the Construction Bar, with the first Unit in the list initially selected by default, or the current Unit on the Construction Bar if applicable. This Structure will be able to construct Units available to it without relying on the Construction Bar. Other Structures of the same type will assist in this construction unless they have been ordered to do otherwise. During a construction, Structure Commands for the Structure will be unavailable until it is cancelled or completed. Below is a step-by-step guide to typical construction in a high-production Structure, building a Light Tank (Tiger Tank) in an Atreides Vehicle Factory:
Step 1:
To select a new Unit type, right click the Behemoth Tank icon (the previously selected Unit). As with the Construction Bar, right clicking when the Unit is currently constructing will place the order on hold, then cancel it. As no Units are being produced at the moments, this will bring up the list of Vehicles that you can build.
Step 2:
The Command Bar will be flooded with the set of Vehicles available to the Structure. Scroll down to the desired Unit, then left click the Unit's Portrait to construct (in this case, the Tiger Tank), or right click to cancel and return to Step 1. You can scroll through the list with the yellow arrow icons. Right clicking on the arrows will move up or down through the list a page at a time.
Step 3:
Once selected, construction of the Vehicle begins, with a timeslice indicating construction progress. At this point you can place the construction on hold, and then cancel it, with the right button, returning to Step 1. You can also queue additional constructions of this vehicle by left clicking. The number queued is shown in the top right corner. With the Structure occupied, no other options for the Structure are available. The Status Readout will be updated to show the current action, in this case "Building: 68%".
Step 4:
With construction of the Vehicle completed, the Structure returns to normal after the Vehicle emerges. The selected Unit type remains in the box. You can left click again to create another, or queue, or right click to bring up the Vehicle list again.
2. Unique Structure Command Bars
Below are a set of Structures that have additional features or unusual configurations to their Structure Command Bars that justify detailed description.
1. The Starport Structure Command Bar
The Starport is used to order bulk supplies of standard Vehicles and Aircraft from off-planet. C.H.O.A.M.'s prices tend to fluctuate, and will sometimes exceed the standard price of a Unit, so it's worth comparing prices before you make your purchase. You can order several Units at a time, but never more than six on a single transaction, and never more than five of the same Unit type in one delivery. There is a limited stock of Units available, but the stock recharges over time. Due to their affiliation with the Guild, House Ordos receive special shipping priveleges. They are allowed greater access to C.H.O.A.M. stock, able to order up to twelve Units in a single transaction.
To establish contact with the C.H.O.A.M. Merchant's Guild, left-click the button labelled "Contact C.H.O.A.M." The Command Bar and Construction Bar will be replaced by the following interface:
Units can be ordered by left-clicking the appropriate icon. As with the Construction Bar, multiple left-clicks will order a number of the same item, with a tally appearing in the top right corner of the Unit icon. Credits will be removed from your battle account to indicate the cost of purchase. Icons will become unavailable if you reach the extent of your funds, or order the full complement of C.H.O.A.M. stocks for a particular item. Another eight additional Units available for purchase can be displayed by clicking the right yellow arrow, which displays the following screen:
Clicking the left yellow arrow on this screen will return you to the first screen. Once you are satisfied with your order, the PURCHASE button can be clicked to confirm the order, and send the appropriate amount of credits. Your Mentat will then count down the time until the Guild Freighter arrives with your order. The timer will also appear on the Status Readout. The Stormsheath button for the Starport becomes unavailable until the Units have been dropped. To cancel the order, click the CANCEL button. Your credits will be refunded. Either way, you are then returned to the Starport Structure Command Bar to proceed as normal.
The buttons for setting rally points and pre-assigning teams and Behaviour settings have already been explained, but two additional abilities on the Starport Command Bar should be mentioned at this point. The button labelled "Backup" (third icon on the top row) will send for a standard reinforcements battle package of a Trike, Quad, Jeep, 3 Missile Tanks, 2 AA Tanks, 3 Tiger Tanks, 2 Combat Tanks, and 1 Behemoth Tank for the equivalent price (the button is unavailable if you do not have sufficient funds). This is particularly useful at times when you need immediate reinforcements, such as during an enemy assault, and cannot afford to spend the time deciding which Units to purchase.
Below the command icons is a slider bar labelled "Call Spice Lighter". The bar indicates a certain quantity of spice, ranging from an equivalent value of 10, 000 to 100, 000 solaris. Once your credit account reaches the specified value, the Guild will send a Spice Lighter that will land at your Starport and upload your stored Spice, cleaning out your Silos and Refineries, making them available for further storage. The slider indicates the spice quantity at which the Guild will automatically be contacted. Placing the slider at the rightmost position will cause a Spice Lighter to never be called. When your spice quantity is uploaded, you will keep the solaris content of your credit account, and the Spice will be transported off-planet. However, you will be required to pay the Guild's transport levy, a hefty 10, 000 solaris, for this service. You will need to decide if this extortionate fee justifies the result.
2. The Missile Attack Centre (MAC) Structure Command Bar
While most Structures follow a similar format, the MAC has a rather unique method of control, and requires detailed examination. An advanced "Missile Silo" Structure, the MAC can construct any of a House's three standard and one unique tactical missiles, as well as stockpile and store up to five constructed missiles. These can in addition be used for defensive measures, as well as standard attack, within a variable range. Below is a series of steps describing the construction of a missile at the MAC:
Step 1:
Select the Missile Attack Centre by left-clicking it, and the above Command Bar will be shown. There are five command buttons labelled "Build Missile" (indicated by a transparent missile icon). Initiating one of these will allow you to select and begin construction of a missile within one of the MAC's five missile silos. Only one missile can be constructed at a MAC at a time. The Cargo bar indicates how many missiles you currently have stockpiled at this MAC. Because each of the five commands is labelled "Build Missile", and the Cargo Bar has no orange pips, there are no missiles currently stockpiled at this MAC. Left click the first Build Missile button.
Step 2:
These represent the five missiles available for the silo. Left click to select one for construction. Right click will cancel and return you to Step 1.
Tool Tip: Placing the cursor over any of the missiles will display its title, cost for manufacture, and a description of its effects on a Tool Tip.
Once you have selected a missile (the last can be reached via the scroll buttons) you will be placed into Step 3.
Step 3:
Unlike most building situations, other commands are available while the MAC is busy with construction. This means that defensive and offensive missiles can be launched even when the MAC is occupied with restoring your stock. You can place the construction on hold at any time by right clicking on the missile icon. A second right click would cancel the construction and refund your credits. Once it is constructed, you will proceed to Step 4.
Step 4:
With the missile complete, it has now been placed in the first silo, as indicated by the command now linked to that silo, Launch Disruption Missile (Red Missile Icon). If you wished, you could have placed the missile in any of the MAC's five silos by clicking the appropriate Build Missile Button. Note that the Cargo Bar now also indicates that you currently have one missile in stock at this MAC, in silo 1. Launch Disruption will create an attack cursor. Left click with the cursor to launch the missile for attack against that location. Right click to cancel the attack command and restore the House's selection cursor. Stockpiled missiles are also automatically used to defensively protect against incoming missile attacks. Once an enemy missile comes within range, the first missile in the silo will automatically be launched to intercept and collide with it, harmlessly nullifying it. This is not guaranteed, and missiles will sometimes miss. If a missile failed to destroy the incoming nuke, then the missile in the next silo will be launched against it (if there is one), and so on. Once a missile has been launched as a defensive measure, the MAC will automatically begin production of a new missile to replace it.
The same system of construction can be applied to any of the five missile silos shown. The method of changing the range of missile defence will be shown in MAC Step 5.
Loss of power will disrupt the long-range targeting on Tactical Missiles. Until you recover base power, the MAC will only be able to operate in a defensive sense: the MAC will remain on-line, but you will not be able to fire missiles at a target until you regain power. Nukes can also be built from the Aircraft component of the Construction Bar, but the queue is limited to the number of MAC silos you have available.
Step 5:
Clicking the Defence Range icon (third on the second row, a red circle with opposing yellow arrows) produces the above options. A green circle also appears over the MAC (alternatively this range circle may appear whenever the MAC is selected, unless there are no missiles set to defensive). Within this sphere of influence, the MAC is capable of launching defensive missiles. Use the slider to increase or decrease this distance, within a range of 1-5 kms. A kilometre is the equivalent of 3 terrain cells. However, increased Defence Radius decreases the accuracy (shown below as a percentage) of the missile, and therefore the chance of hitting the enemy missile. Click Cancel to ignore changes made, or OK to accept them. You will then be returned to the main Command Bar screen for the MAC.
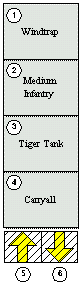

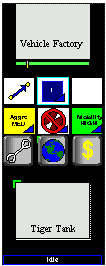
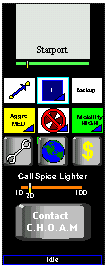
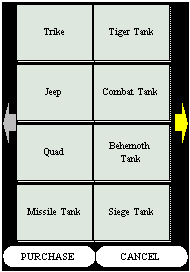
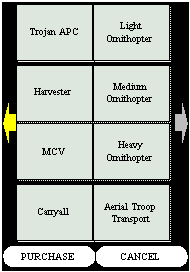
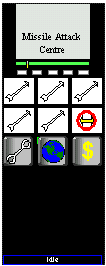
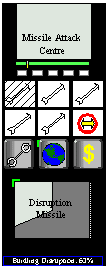

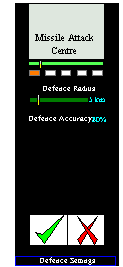
4. The Top Bar
1. The Harvester Surveillance System
Careful control of your Harvesters is essential to a successful campaign on Dune. Without a constant flow of spice, your operations are doomed to failure. The Harvester Surveillance System allows you to observe your Harvesters' activities and status at a glance, and quickly come to their aid if necessary.
When no Harvesters have been constructed, this entire area of the screen is blank. Once a Harvester is constructed, a small animated Harvester icon will appear in the top left hand corner. This icon will animate to display the Harvester's current action. If it is idle, the image will be static. If the Harvester is moving, the wheels will turn. If it is harvesting, spice will filter through it. If it is unloading at a Refinery, the appropriate animation will be displayed, and so on.
Left-clicking on an image will select the Harvester. A second click will centre the screen on the Harvester.
Placing the cursor over a Harvester on the Surveillance System will display the Harvester's Command Bar. Holding the right mouse button over the image will centre the screen on the Harvester and display its health bar and cargo, allowing for a quick checkup. Releasing the button will restore the screen to its original position.
The Harvester icon will flash if the Harvester is under attack, or a Sandworm comes within range of the Harvester. When this occurs, a siren will also tone, the Harvester's position on the Mini Map will flash, and your Mentat will inform you with either "Harvester under attack" or "Harvester in danger." You will also be informed when wormsign is detected.
As more Harvesters are constructed, their appropriate icons appear on the bar. Once more than five are created, scroll arrows appear to list additional Harvesters that cannot fit onto the four-Harvester surveillance bar. An arrow is shaded when the bar cannot be scrolled in that direction.
2. The Team Monitor
The Team Monitor is an extension of your Unit groupings, visually representing the state of your 10 created Teams. Use it to get a quick overview of what your Teams are doing, without having to inspect them individually. Each numbered button is overlayed with an animated icon that represents the action that a Team is currently performing (if any), much like those of the Harvester Surveillance System. With the Team Monitor, you can know if a Team is moving, and when they reach their destination, without having to take your eyes off your current task to take a look.
Tool Tip: Placing the cursor over a Team icon displays the current Status Readout of the Team ("Moving", "Awaiting Orders", and so on), as well as the name and type of each Unit in the Team. The Team's leader is designated by using blue text for his name.
Left-clicking on an icon will select this Team. A second click centres the screen on this Team. This mimics the use of the number row on the keyboard.
Keyboard Command: You can also use the Team Monitor to create Teams instead of using the number keys row. For example, you can hold down the Ctrl key, then click on the Team button of your choice, and this will create the Team with the Units you have selected.
The Team's Command Bar also pops up as long as the cursor is over the Team icon. Holding the right mouse button over a Team button will centre the screen on the Team and display its health bar and cargo, allowing for a quick checkup. Releasing the button will restore the screen to its original position.
Finally, a Team icon will flash red if the Team comes under attack. The Team's position on the Mini Map will also flash, with retracting rectangles indicating its position. You can then switch to the Team by clicking the Team's button, or by using the Centre on Last Message function.
3. The Alert Buttons
These three buttons are designed to provide advanced warning of approaching dangers, and allow wide-scale commands to deal with them. These buttons will only appear if you have an on-line Command Outpost to receive and broadcast this information. When activated, they will place your base under Red Alert status as a particular global procedure occurs. Sirens will roar and the base will be basked in deep-red light.
1. Storm Alert
If a storm is detected, the blue button will begin to flash red as the storm approaches your primary Command Outpost. The blinking will begin once your Mentat says "Warning: Storm detected." The duration between pulses will decrease as the storm approaches. Storms are described in detail in the profile of the Arrakis environment.
Left clicking this button will activate the Storm Alert. Unless they have some form of protection against storms (such as a Fremkit tent, or can go underground), all Units in the danger zone will automatically enter any Bunkers you have to avoid storms, the closest Units taking preference. If you have more Units than shelters, the surplus Units will not respond to the alert. Left-clicking the button again will release the Units from Bunkers, and they will endeavour to return to their original positions, while Fremen will close up their tents. Nothing happens if you do not possess any Bunkers, except that Fremen Units will set up their tents.
Right clicking this button will activate the Stormsheath of every Structure that has one, unless the Structure's Respond to Global Sheath tab is toggled off (dark green). This command is particularly useful when a storm is approaching, or in extreme cases of warfare. Structures that are already Sheathed will ignore the command. If all reponsive Structures are already Sheathed, clicking this button will deactivate all Stormsheaths (Structures specified to ignore this command will of course not be deactivated either).
2. Worm Alert
If a Sandworm is detected on sight by any of your Units, the second (yellow) button will begin to flash orange. The blinking will begin once your Mentat says "Danger: Wormsign." The duration between pulses will decrease as the worm approaches your Units or base, and increase as it moves away.
Left clicking this button will command all ground Units within dangerous range of the Sandworm to move onto rock to avoid it. Clicking it again will return the Units to their previous locations.
Right clicking this button will recall all your Harvesters to your base, and they will enter Refineries if they have any spice harvested (much like if you had given them all a Return command). If there are not sufficient Refineries, those closest and with the most spice go first, and the others queue. Above all, they must reach rock surrounding the base. In addition to protecting them from Worm attacks, it is also useful if you are low on cash. Right-clicking the button again will tell the Harvesters to search for nearby spice fields, or return to their original fields, and start harvesting.
3. Enemy Alert
The third (green) button will flash to track the proximity of enemy Units approaching your primary Command Outpost after they are detected, indicated by your Mentat's statement of "Enemy approaching." The duration between pulses will decrease as the incoming force approaches your base, and increase as they move away.
Left clicking this button will display the health bar above all of your Structures, allowing quick check-up of your base at a glance. Incidentally, a Structure that reaches damage levels in the yellow zone will automatically display its health bar to ensure that you are aware that it has suffered considerable damage. Left clicking this button will also toggle a visual representation of the detection ranges of your Units and Structures (a circle appears around each Unit).
Right clicking this button will begin the automatic repair of all of your Structures to maximum health, regardless of their current auto-repair settings. Right clicking again will cease the mass repairs. Repairs will also cease once all Structures reach full health. If funds are depleted during repairs, they will continue once funds have been restored.
4. Harvester Coldspots & All Unit Coldspots
A Coldspot is a rectangular area of the screen that you have declared forbidden territory to your Units. For example, you could assign a Harvester Coldspot over the enemy's base, and all of your Harvesters would plot routes that would avoid moving through the enemy base; or over terrain hazards, so that Units will avoid blundering into their path. Harvester Coldspots only affect Harvesters, while All Coldspots affects all of your Units, including Harvesters.
1. Drawing a Coldspot
First left-click on either of the Coldspot icons. For this example, we will use an H Coldspot. Next, left-click on an area of the map and hold the button. You can then drag out a grey dashed band-box to encompass the region to be avoided. The Coldspot bandbox will remain anchored on the screen once you release the mouse button. Now that the Coldspot is set, your Harvesters will avoid entering the assigned circular area when plotting movement paths. If the target for the Coldspot is a Unit, then this Unit will be the centre of the Coldspot, and the Coldspot will move with the Unit. The circle will be grey for an All Coldspot, and orange for a Harvester Coldspot. Coldspots are further identified by an ice-cube icon in the top right corner of the Coldspot.
It is still possible to modify a Coldspot once it has been placed. With no Units selected, click on the area inside the Coldspot or its bandbox border. This will select the Coldspot, placing white selection edges on all four corners. Right-click if you want to de-select the Coldspot. Holding down the left mouse button and moving the mouse will drag the Coldspot to a new location. Once you release the mouse button, the Coldspot will anchor at its new position. To delete a Coldspot, select it first, then right-click the relevant Coldspot icon, or hit the Del key.
5. Centre on Construction Yard
Left clicking this icon will centre the screen on your Construction Yard (as with the H command in Red Alert).
Keyboard Command: The H key will centre on your primary Construction Yard.
6. Centre on Last Message
Left clicking this icon will centre the screen on the last Radar or Mentat event that supplied information to you. For example, when told "Unit Ready," you can select this option to centre on the produced Unit. Or if it was "Our base is under attack" you can use this option to centre on the area of the base that is being attacked. Or "Harvester under attack" will centre on that Harvester, and so on. This allows you to quickly find locations of peril, and intervene. Repeated tapping will switch sequentially between the last eight transmissions.
Keyboard Command: The V key will centre on the last Unit or Structure that gave reference.
7. Centre on Idle Unit
Clicking this button will select the nearest Unit to the centre of the Battlefield Window that is not currently performing an action. Repeated clicking will move to idle Units that are further and further from the current location.
8. The Magnify Icon
Right clicking this button will decrease the magnification of the Battlefield Window, providing increased visual range of the mission map with reduced graphical detail. Left clicking this button will increase the magnification of the Battlefield Window. There are three settings: the "close-up" magnification of C&C: Tiberian Dawn, the intermediary magnification of C&C: Tiberian Sun, and the "remote" magnification of C&C: Red Alert. Medium magnification is the default setting.
Keyboard Command: The + key increases magnification. The - key decreases magnification.
9. The Mentat Icon
Left clicking this icon will freeze game activity and bring up the Mentat Database, where you can consult your Mentat about a series of topics.
Keyboard Command: The ? key will bring up the Mentat Database entry for the currently selected Unit, or the Database index if a Unit is not selected.
The Mentat Database appears as follows: An electronic gridwork in the background, overlaying a faint monochrome image of your House's herald. Once a Unit or Structure is selected from the index, the index window will shatter, the shards scattering off-screen with a distinctive glass-breaking sound effect. Once the screen is clear, a large rendered image of the selected Unit or Structure is displayed in the top left corner, rotating on its axis but otherwise unanimated. Possibly the image is initially a green wireframe, to which a texture is then applied. This image is similar to the Trike and Starport rendered sequences shown on Edric's video-screen in a couple of the Dune 2000 Ordos briefings. A dialogue box below the image will show a text description of the selected Unit. This information is standard for all Houses. Another window to the right of the rotating image displays the Unit's vital statistics, such as armament, armour type, movement rate, and so on.
Your Mentat will make additional comments to this information as a voice-over, also shown as subtitles in a dialogue box below the description box. In this manner, your Mentat will add further House-specific tactics and suggestions to the neutral shared information if necessary. Therefore we have the benefit of the Mentat Database, without the complication of certain standard Units and Structures not requiring additional elaboration, such as the Refinery. In this case, there would simply be no Mentat advice.
10. The Clock Icon
As much as real-time play grants the benefit of immersive knuckle-whitening action, unfortunately it also promotes sloppiness in the player's actions. For example, with so many events competing for the player's attention, he will be more inclined to just lob a group of assorted Units at the enemy, rather than consider the individual strengths and weaknesses of each Unit type in that group. A competitive strike against the enemy could be thwarted simply because the player isn't able to get his cursor over moving enemy Units in time.
This feature grants the player an extremely useful but controversial option: the ability to stop time in the game. Clicking this button will freeze all game activity. The player can then take the time to track down events, analyse situations, and attend to individual Units, assigning them commands that they will initiate once you start time again by re-clicking the icon.
Of course, this works great for single-player games, but in a multiplayer environment, having the game repeatedly frozen by another player would be a severe irritation. Here are a few pausing methods that could be considered as an alternative:
- A certain amount of time (specified in the game lobby with the other options) is allocated to each player. For example, each player is allocated ten seconds at the start of the game. This is the amount of time that the player can keep the game paused, and can be activated at any time. The amount of time that a player has remaining is shown over the Clock Icon. When freezing is engaged, the timer counts down for as long as the freeze is engaged. Once it expires, the player cannot freeze time for the remainder of the gaming session. Or alternatively, additional freezing time is allocated after an extended period of time, or is allocated gradually.
- When the Clock Icon is activated, everything moves in slow motion.
- Each player can only engage the freeze-time a set number of times during the game.
Keyboard Command: The Spacebar key will also toggle time on and off.
11. The Options Button
Left clicking the Options button will freeze game activity and bring up the Options menu. Note that the game will not be paused during multiplayer games. The Options menu has the following choices:
Save Mission: This option is used to save the mission you are currently playing in case of tragedy. The ability to save and restore games is essential in Multiplayer games due to the danger of lost connections and lag. You can save over an existing saved game, or select a fresh one with the [Empty Slot] option. Scroll through the existing saved games with the up and down arrows. Once you select a spot to save, you will be asked to enter a description for the saved game. After hitting Enter, the save data will be updated.
The following information will also be included for ease of retrieval: the ID of the player who saved the game, the current difficulty level (Easy, Medium, or Hard), House (indicated by a small icon of the House's Herald), the number of the Campaign Mission, and the Date and Time when the game was saved. The Save button will save the selected game, while the Cancel button will leave the screen without saving.
There could be a number of categories for saved games. Each category would be available from a drop-down list. For example, Multi-player games are not included in the same list as campaign missions, each player has his own set of saved game categories, and saved game categories for different campaigns for the same player could also be separated. The player could be able to customise these "folders".
Possibly the game will also auto-save at the beginning and end of each mission. An Auto-Save feature could also be implemented that automatically saves the game in progress at a user specified time interval. The Auto-Save can be set to perform at intervals ranging from 30 seconds to 30 minutes. Not happy with the results of your last battle? Just reload the Auto-Saved file and try again.
Load Mission: Select Load Mission to restore a saved game. If you are currently playing a mission, it will be overwritten unless you have already saved it. Left click the game of your choice, then click Load. Otherwise you can click Cancel to leave without loading.
Delete Mission: This option is used to erase existing saved games to free up harddisk space. This is handy if you are too addicted to Melange to return to the operating system of your choice and delete the files from there. Select the saved game you want to eliminate, then click the Delete button. A confirmation window will pop up to confirm your choice.
Game Controls: The panel produced by this option is used to modify game options, such as sound settings. A series of horizontal levers can be tweaked to adjust the game speed, scoll rate, music volume, sound effects volume (such as weapons fire), and voice volume (such as your Mentat's in-game warnings and statements).
The frequency of Unit responses (selection and acknowledgement sounds) can also be altered. Both kinds of sounds have a set of three radio buttons: None (Units do not make these speeches), Infrequent (they will make them only the first time that they are selected/given a command), or Always (the usual frequency of response). Thus the player can moderate the degree of response to his liking.
You can modify the delay period of Tool Tips from here, or turn them off completely. There is also a toggle button for the pop-up Hints, which when activated, will appear to explain features of gameplay and Units that appear at more advanced levels when first encountered.
To the left of the mandatory Cancel button is a Music button used to adjust the game's "CD-Player". From here you can make your choice from the game's selection of Digital Audio, hopefully provided once again by the stunning talents of Frank Klepacki. This version of the CD Player includes some additional features. You are given more control over the play list. You should be able to set which tunes are played, and which aren't, and the sequence. Random shuffling should also be included.
If sufficient songs are available, then we think it would be an excellent feature for each House to have its own separate musical "theme". There would be a separate "CD" (a preset selection of tracks from the total soundtrack) in the CD-Player for each House, including appropriate songs. For example, House Harkonnen's tracks would mostly be aggressive, powerful, heavy, thumping metal, similar to "Die!!" and "Warfare" in Command & Conquer. House Atreides tracks would be noble and inspirational, featuring choral echoes and uplifting wind instruments. House Ordos tunes would be quiet, ambient and insidious; riffs with menacing undertones. House Corrino would present war as honourable, united action working toward a proud goal, incorporating military drums, factory whirs and hums, and classical orchestral music. As examples of this categorisation, below we include the titles of some existing songs that we think have a suitable acoustic "feel" for a particular House:
House Atreides
Group Name Album Name Track Track Name Twisted Sister Alive at Hammersmith (CD 2) 5 We're Gonna Make It Steelheart Tangled in Reins 1 Loaded Mother Steelheart Tangled in Reins 2 Sticky Side Up Manowar Triumph of Steel 7 Power of Thy Sword House Harkonnen
Group Name Album Name Track Track Name Sepultura Roots of Sepultura (CD 1) 1 Roots Sepultura Roots of Sepultura (CD 1) 7 Spit Metallica Black 7 Through the Nether Metallica Load 5 King Nothing House Ordos
Group Name Album Name Track Track Name Ministry Filthy Pig 2 Lay Lady Lay Steelheart Tangled in Reins 3 Electric Lovechild Metallica Load 8 Cure Metallica Load 12 Thorn Within House Corrino
Group Name Album Name Track Track Name Sepultura Roots of Sepultura (CD 2) 1 Intro Manowar Louder Than Hell 1 Return of the Warlord Metallica Black 12 Struggle Within Manowar Triumph of Steel 3 Ride the Dragon Some tracks would appear in different House categories where they are appropriate. To facilitate this, some tracks from the original Dune 2000 could be included, adding that additional nostalgia flavour. The player does not have to stick to the theme filters, and can play songs from the entire list if he so desires.
One of the great advantages of gaming music is that it does not have to merely present a set sequence of backing tracks. Instead, the music can be adjusted to suit the current situation in the game, and therefore provide more effective atmosphere. This was used to some extent in Dune II. For example, a couple of fairly short frantic, striving combat-appropriate music cuts can be available that are triggered when your base is under attack. Once the attack is averted, the battle tune could fade out, and you will be returned to your position in the CD-player track-list. The same could apply if the dynamic daylight cycle fades to night and things become more tactical, or if you've been controlling just one unit for a while. The music becomes more personal, atmospheric and covert.
- Quit Mission: Select this option to bail out of your current game. You can either Abort the Mission, upon which you will be returned to the Main Menu, or Restart the Mission from scratch. If you fail your mission, you will receive a similar set of choices, except that there will also be an option to Load a saved game from here.
- Briefing: Selecting the Briefing option will give you a text summary of your mission objectives and their background. You can also select to replay the video briefing for this mission from here.
- Resume Mission: Select this option to continue your conquest of the Desert Planet, Arrakis.
Keyboard Command: The Escape key will also bring up the Options Menu.
12. The Credit Counter
This counter displays your Battle Account - your credit balance in the Imperium currency of solari, relative to your spice storage. The digits over the vertical white bar on the left indicate the amount of money being kept in reserve. This amount can be adjusted by holding down the left button over the bar, and sliding it left or right. When credits diminish to this amount, production will halt. Therefore, credits can be kept in reserve for emergency actions such as repairs.
Keyboard Command: The size of the account reserve can also be increased or diminished with the [ and ] keys.
The Sidebar can be toggled by right-clicking the Credit Counter, occasionally useful when you want a considerable view of the Battlefield.
Keyboard Command: The TAB key will also toggle the Sidebar.
With this exhaustive explanation of the Melange interface completed, the document will now go on to describe some of the additional proposed components that we suspect will enrich the player's gaming experience. The first are the in-game Multiplayer controls.

5. Multiplayer Panel
A pop-up bar at the bottom of the Interface screen hinged to the Sidebar becomes available in Multiplayer Games. It can be clicked to close or open. Once open, the above bar is shown. The Multiplayer Interface handles sending of messages to other players, the establishment and breaking of alliances, and if the selected player is an ally, the exchange of Units, Structures and money.
The Interface can show up to seven other players that you are fighting against. The player (designated Player 1 in this case) is not shown. The first cell in each row displays the selected House of each opponent, indicated by the appropriate Herald.
The next column of cells show the name, colour, and number of each of the players. Opponents controlled by the AI and not Human players are shown firstly by the fact that their description is a lighter shade, and secondly that they are allocated names such as "AI Player 1". To send a message to any of these players, left click on a player's name. This will highlight the name box for the player. You can have several boxes active at a time, allowing you to send the same message to several players. Click a box again if you need to turn off the highlight. Now click on the long message box at the top of the Multiplayer Panel, and a cursor will appear in the message box. Type in your message, press Enter or click Send, and the recipient will receive it. A player must have a fully-powered, operable Command Outpost to send and receive messages.
Keyboard Command:You can also send a message to one of the other seven players by using the F1-F7 keys. If the Multiplayer Interface is closed, it will automatically open as the message box cursor becomes available. In this case, the Multiplayer Interface will close again once the message is sent.
Beside the message box is a mechanism for selecting preset kinds of player highlighting. Clicking on this left-hand icon will cycle through the states All (send a message to all players), Allies (send a message to all allies), and Enemies (send a message to all enemies). The player name boxes will be highlighted accordingly.
Keyboard Command: You can use the F8 key in a similar manner to send a message to the players currently established in the cyclical icon explained above.
In a real-time situation, every second counts. Sometimes even the time taken to write a message to an ally can be long enough for an enemy to cripple your base. And as similar messages are often sent, a system where messages can be saved and sent quickly can really speed up the communication process. Click the top right button to pop up an extra panel above the Multiplayer Panel, showing a list of 20 message boxes. Each contains a chat message, such as "Help me! I'm under attack!" or "Spice field here!". You can click any of these messages and overtype them to modify them. To send a quick-message, just click the Transmit button next to the message, and it will be dumped to the message box on the Multiplayer Panel. Then click Send, or press Enter. Simple.
To speed up the process even further, you can type the associated number for the saved message, and the associated message will be sent. For example, if the second message preset is "How about an Alliance?", you can simply enter "2" as a message in the long message box, press Enter to send the message, and the extended version will be sent to the selected player(s).
To the right of each player's name is a value representing the number of kills that the player has achieved so far in this game. Previously this information was only accessible from a secondary screen on the Mini Map.
The third column shows your diplomatic status with each player. Opponents can either be an Enemy or an Ally. Click the diplomacy button beside the appropriate opponent to change your diplomatic status to this opponent. Once an opponent has become an Ally, you will be able to share certain resources, and so items in the preceding rows will become available for this player. Both players must agree to an alliance. Otherwise, if you have declared an opponent as your Ally, you will be able to send him resources, allow him to use your facilities, and your Units will not attack him, however, you shall not have these benefits until he also allies with you. If you have set an opponent to Ally, but the opponent has not done the same for you, or vice versa, this is indicated by a red box around this icon. An Alliance will be broken if either player attacks the other. Computer opponents are able to forfeit requests to ally if they have been suspiciously treated (like if you'd just plundered his base).
The Transfer command allows you to give Units or money to an Ally. To give Units to an Ally, select the Units, then click the Transfer button for the appropriate Ally. The selected Units will now no longer be under your control, but will belong to the Ally player. You can also transfer Structures in this manner, but only one can be selected at a time. Some Units will require special buildings before they can be transferred, such as Bombers. To transfer credits into your Ally's account, make sure you don't have any Units or Structures selected, then click the Transfer button. A cursor will appear in the message box. Type in the desired amount, and it will be removed from your Credit Counter and transferred to your Ally's.
The remaining five columns control resource sharing between Allies. You can toggle the state of these elements by clicking them. A light blue icon shows that this element is active. Like alliances, both players must activate a resource element for both to benefit, and if both do not have it active, then this is indicated by a red box. If both players have the Map option active, then both players will see previously Shrouded areas of the map revealed by the other Ally. The Building option allows Allies to share facilities. For example, you can use your Ally's Repair Pad, or rearm at his Airbay. You could also conceivably unload your Harvester at an Ally's Refinery, although this is not recommended unless the Storage and/or Credits options are active, for your Ally will receive the full benefit. The Credits option will combine the Credits of two players so that they will both operate from a combined monetary pool. The Storage system works similarly, in that you share silo space for storing Spice. Finally, the Power option combines the Power of two Allies.
The yellow arrow is used to "minimise" or "maximise" the Multiplayer Interface. If the full-sized Multiplayer Interface is obscuring your view, click the arrow to shrink it so that only the top row and the next two preceding rows are shown. In the area to the left of this arrow, a vertical scroll bar will then appear for moving through the list of players. When in the minimised state, the arrow will point in the opposite direction. Clicking it again will restore the maximised state.
Below the yellow arrow is the signal button. Use this to send off a signal flare, used to indicate points of significance to your allies, such as an area rich in resources, an enemy base, Units needing help, and so on. Click the button, then click a target area, either on the Battlefield Window or the Mini Map. A bright flash of light (in the colour of the player that fired it) appears, and burns for a short time. Only yourself and your allies can see it, and can use the Event button to move to it, if they so desire.
Finally, click the CLOSE button to seal this pop-up bar again. Click the OPEN button which appears in the previous location of the CLOSE button to restore it.
Keyboard Command:To open or close the Multiplayer Interface, use the Enter key.

6. Mission End Score Screen
When you have completed a mission, the Score Screen appears to tell you how you well you managed your forces during the mission. It displays the number of Units from each House that you killed (including neutrals such as Smugglers and Civilians), and the number your Units produced and killed in action. Also the number of enemy buildings you captured and destroyed, and the number of your own buildings that were produced and destroyed. It also shows the amount of spice you harvested, used, and your consequent surplus, as well as the amount of time you spent on the mission.
From this data, percentage ratings for Leadership and Efficiency are calculated, which in turn are used to arrive at a final score for the mission. The degree of this score reflects your assigned rating for this mission (Sand Flea, Warlord, and so on). A list of the top ten scores are kept, so you can compete against other players for the best scores.
All this is largely unchanged from the earlier scoring formula; however, performing well in a mission now has a greater significance, for the value of the score is translated into solaris, which the player can use in later missions. The player's finances are no longer limited to the confines of an individual mission. The player has a treasury where he can keep excess funds throughout the campaign. Although the credits accumulated during a mission cannot be transferred to the treasury (it would be too easy to cripple the enemy, then leach off him to flood your coffers), the bonus ascribed from your scores is kept in your treasury, and can be assigned as you choose to boost the funding provided by your superiors at the start of every mission. Your starting funds can also change based on earlier performance: inefficient management of your forces and poor leadership will effect your superiors' faith in you, and cause them to reduce future funding until your performance improves. Alternatively, shine in your efforts, and you will be rewarded with a boost to your starting funds in the next mission.
In Melange, Unit properties are not permanently static. As Units engage in combat, survive confrontations and generally perform their function successfully, they will gain experience from these encounters. Mention was made of this in describing Unit Experience. However, in addition to making Units more useful in a single mission, experienced Units can also be carried over into further missions.
In addition to the features mentioned above, the Score Screen is used to decide which Units will be saved for future use. Once a Unit is saved, you are given the option of assigning him to join you on the battlefield at the start of any mission. However, you only have three Unit carry-over slots at any time, so you will have to choose wisely. In addition to the scoring information outlined above, the Score Screen has three Unit Portraits onscreen. These indicate which Units from the completed mission are to be saved for later use. By default, these slots will be occupied first by any Units that you have already carried over from earlier missions, and have not been injected into the last mission. If a slot has become vacant due to injecting a carry-over Unit into the mission, then the vacant slot will be automatically occupied by the most experienced Unit that was under your command in the last mission.
If the default choice of Units for the carry-over don't satisfy you, this section of the Score Screen is used to modify this choice. Left click one of the Portraits, and a list of Units from the last mission appears (similar to that used in the Selector). Click one, and it will replace the Unit in this Portrait slot. This decision may cause you to drop a Unit carried over from an earlier mission in favour of a Unit from the current one. If this is the case, then the program will warn you of this, and query if you are certain of this choice. Once you are satisfied with your decision, the selected Units will be saved in their current form for assignment to future missions (although they will have healed any damage by the time they arrive in the next mission).
Or, if this system of selection is a little disorientating, then some kind of Frigate could arrive at your base automatically once a scenario's objectives are completed. You have no control of movement of the Frigate once it has landed, but you can place up to three Units into it, and deploy to remove them if necessary. Commandos or other special one-mission-only Units cannot enter it. Any Units that you had left in your carry-over slots (the "Top Three") when you started the mission will occupy the Frigate when it arrives, and can be removed to make way for replacements from the current mission at your discretion. Once the Frigate is at full capacity, it will take off, and the mission will truly end. The Frigate drop is optional; you can select from a pop-up menu if you want the mission to end immediately, or risk waiting for the Frigate to turn up. You might not always get the Frigate option, depending on the circumstances. It might even be necessary to include a prerequisite structure for the Frigate to arrive, such as a Starport.
Regardless of the means of retaining them, as these veteran carry-over Units are special, some method of making them easier to pick out in the crowd when injected into a later mission would be a good idea. Perhaps they are highlighted with a distinct outline, or radiate a translucent glow that is the colour of your House. Only standard Units can be carried-over. Units specially assigned for a mission such as Commandos cannot be placed in any of the carry-over slots.
7. Backup Management Screen
Once the mission briefing for the next mission has been completed, the Backup Management System screen will be displayed. Here, with a combination of the initial grant provided to you by your superiors for this mission, your surplus funding, and your veteran carry-over Units, you have control of the selection of your primary defence force when you begin your mission, and the precise complement of your reinforcements. The Backup Management interface is shown below:
The top left window grants control over your "Top Three," the three carry-over Units you have currently selected. The window to the right of these three Portraits controls your finances. The counter bar labelled "Treasury" shows your entire bank balance that has been saved from your surplus from previous missions. The counter bar directly below it labelled "Mission Account" shows the amount of funds that has been allocated to the current mission (this is the amount that will be shown on the Credit Counter when you start the mission, after you have made any modifications on this screen). The bar with the horizontal arrow labelled "Mission Grant" is the amount that your superiors have provided for this mission. In earlier products, this would be the quantity of credits that you would be assigned when you begin the mission. Be warned that poor performance in an earlier mission will reduce the confidence your superiors place in you, and they will grant you less funding. Alternately, if your actions are considerably economical, your superiors will assign you a considerably higher grant. Moments after this screen appears, the amount from the Mission Grant will travel through the arrows and trickle into the Mission Account.
Left-clicking or holding the lower arrow (that closest to the Misson Account) will assign cash from your Treasury to your Mission Account, and the upper arrow (that closest to the Treasury) will perform the reverse action, transferring Mission Account credits into your Treasury. If you so desire, you could dump your entire Treasury savings into your Mission Account if you know you are coming up against a formidable challenge, or have already been struggling with this mission in earlier attempts. However, there are restrictions on the amount that you can transfer from the Mission Account into your Treasury, based on the minimum funding that you need to gain a foothold in the next mission (for example, the total amount of solaris needed to erect a base capable of creatings its own funding)
The next window on the right controls the complement of your Starting Squad, the team of Units that will be assigned to you when you first begin the mission. Some of the Units given to you will be fixed. For example, if you do not begin with an established base, you will not be able to replace the given MCV with another Unit. Or if you are given a new prototype Unit, but will not be able to produce this Unit during the game, then it will also remain fixed in the squad. The same applies if you were granted a Commando Unit for this mission, such as Gurney Halleck or Duncan Idaho. If you cannot afford any extra Units, you will just have fixed Units in the squad.
The number of icon boxes shown in this window will be dependent on the number of Units you will be permitted to begin with for the particular mission. In this case, a rather large Starting Squad of 12 is permitted. If even more starting Units are allowed, scroll arrows will appear on the right edge of the Starting Squad window.
The two long columns of Unit icons along either side of the screen indicate Unit types that can be added to your Starting Squad. This example uses the entire Unit list available to you. Almost all combat Units for your House (in this case, Atreides) are shown here. If a Unit type is not yet available at this point in the campaign, the icon will be blank and unselectable. Apart from fixed Units, any Units in the Starting Squad can be added or removed. To add, for example, a Tiger Tank to the Squad, left-click the Tiger Tank icon and a highlighting box will appear around the icon. Then left-click on the position in the Squad you would like it to occupy. An icon for the Unit type will then appear at that position. The cost of the Unit will then be subtracted from your Mission Account (you can find out the price of a Unit by placing the cursor over the Unit, and checking the Tool Tip information). To remove a Unit that you have added, either perform the same action as shown above again, or in reverse (click the Unit in the Squad, then the Unit icon on the side of the screen). Its cost will then be refunded. You can also swap Units inside a Squad by clicking on one Unit, and then the other.
Each Unit has a certain level of "prestige", which helps to stop the player from flooding his Squad with extremely powerful Units. For example, if he tries to assign 11 Heavy Tanks, about half of the icons in the Squad will be overlaid with red "no" graphics, and they will not be assigned to the Squad when you begin the mission. "Selling" a couple of Units will remove this effect. In other words, you can begin with a squad of extremely powerful Units if you so desire, but it will result in a smaller squad. The same will also probably occur, based on the same prestige rating, if you add any of your veteran Units to the Squad. This will operate in the usual manner. That is, left click the veteran Unit in the Top Three window, then left-click the position where you wish to place it in the squad.
The large window below these three windows controls the assignment of Units to Reinforcements. These are aerial drops of fresh troops that are automatically sent to you during campaign missions, usually after a certain objective has been completed, or a period of time has passed. This layout will differ considerably from mission to mission, depending on the number of reinforcements in a mission, and each drop's complement. In this case, two envoys of Reinforcements will take place during the course of the coming mission, the first consisting of two Carryalls (which can each carry one Unit) and one Aerial Troop Transport (which can carry five infantrymen). The second consists of three Carryalls.
You have control over the Unit types that are brought in these Reinforcement teams. Although you are limited in the number of transport aircraft that can be assigned to a Reinforcement set, (in this case, both sets of Reinforcements cannot exceed three transport aircraft each), you can alter the complement of ATTs and Carryalls. Example: the player decides that he would rather have a payload of Infantry in the first drop team, rather than a Vehicle. Note the thick-bordered Aerial Troop Transport and Carryall icons in the bottom left corner. Click the Aerial Troop Transport icon, then click on one of the Carryall icons in the Drop Team 1 window. The Carryall Icon will be replaced with an ATT icon, and the single slot for a Vehicle will be replaced with five slots for five Infantrymen. If any Units had been assigned to the transport when the transport was removed, they are refunded.
You can now start assigning Infantry to your ATTs and Vehicles to your Carryalls. The same control methods used in Squads are available here, with certain obvious restrictions. For example, you cannot place Vehicles in ATTs or Infantry in Carryalls. You can also send carry-over Units in Drop Teams. Unlike Starting Squads, the prestige of assigned Units will not reduce the amount of space in the transports.
Finally, there is a row of seven buttons along the bottom of the screen. Selecting Begin Mission will accept the assignments that you have created, and if all requirements are met (for example, you will not be permitted to begin without at least one Unit assigned to each of the Reinforcements transports), the mission will begin. The next button will display the Mission Briefing as a text report. You could also replay the Video Briefing. This button is useful to review your orders, and take advantage of given information to select appropriate Units for your mission. The Random button will command the computer to make completely random assignments of Units to your Starting Squad and Reinforcements. This is useful at times when you're not too bothered about how you want to make assignments and are eager to quickly enter the mission, but the default set for this mission does not satisy you. You can then tweak the results for yourself as you so desire. The Reset button will restore the setup of Squads and Reinforcements to the default assignment that is set for the particular mission. There might be a confirmation window that comes up at this point before losing your changes. With Load you can load a saved game, Save will save the game at this screen, and Abort will return you to the main menu (again, with a confirmation being fairly likely).
Remember that this screen will not always appear. In some missions, you will be assigned a very specific Unit set or initial balance, and will not have access to your saved money or veteran Units until the next standard mission.
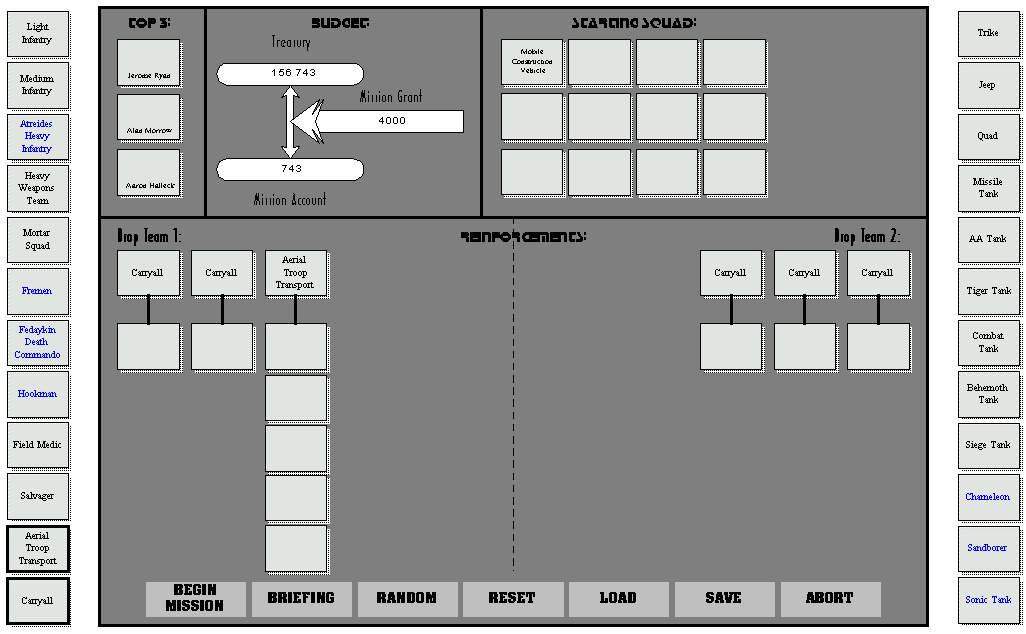
![]()
END OF CHAPTER. Please click here to go to the next section, which will describe the terrain you will encounter on the surface of Arrakis, and the Structures that will be made available to you as you progress through the Melange Campaigns.
Copyright 2000 [ Stuart Walpole & Andrew Schuurman ] All Rights Reserved